Safety Precautions
Please make sure to first read the safety information in order to avoid hazards.
Scope
The scope of this document is to give a general introduction on the RetailPlayer platform helping the user to run a basic setup and have an audio stream playing out from the device. For more detailed information please refer to the RetailPlayer user manual.
Quick Install Video
Watch this 3 minutes video to quickly learn how to setup your RetailPlayer
Hardware Installation
The Barix RetailPlayer devices are audio over IP decoders conceived to be managed remotely from the RetailPlayer Portal. The devices are configured by default to contact the Barix Cloud Portal at manage.barix.com. All the configuration for the site/device is downloaded automatically, and a stream can immediately start to play if configured.
RetailPlayer application can run on several device types, please use the below links to checkout the first steps required to hook up your device for playback:
The difference are in the HW only. The software running on those devices is exactly the same.
Play Barix Radio
Now that your device is connected and ready, let’s play Barix Radio
The first thing you need is an account on the RetailPlayer Portal at: https://manage.barix.com
To get an account please submit this form: https://to.barix.com/retailplayer_portalaccount_request
Once you receive your credentials. Login in the RetailPlayer Portal and follow the below steps:
-
In the Portal Dashboard locate the ‘Device’ button to access the Device List
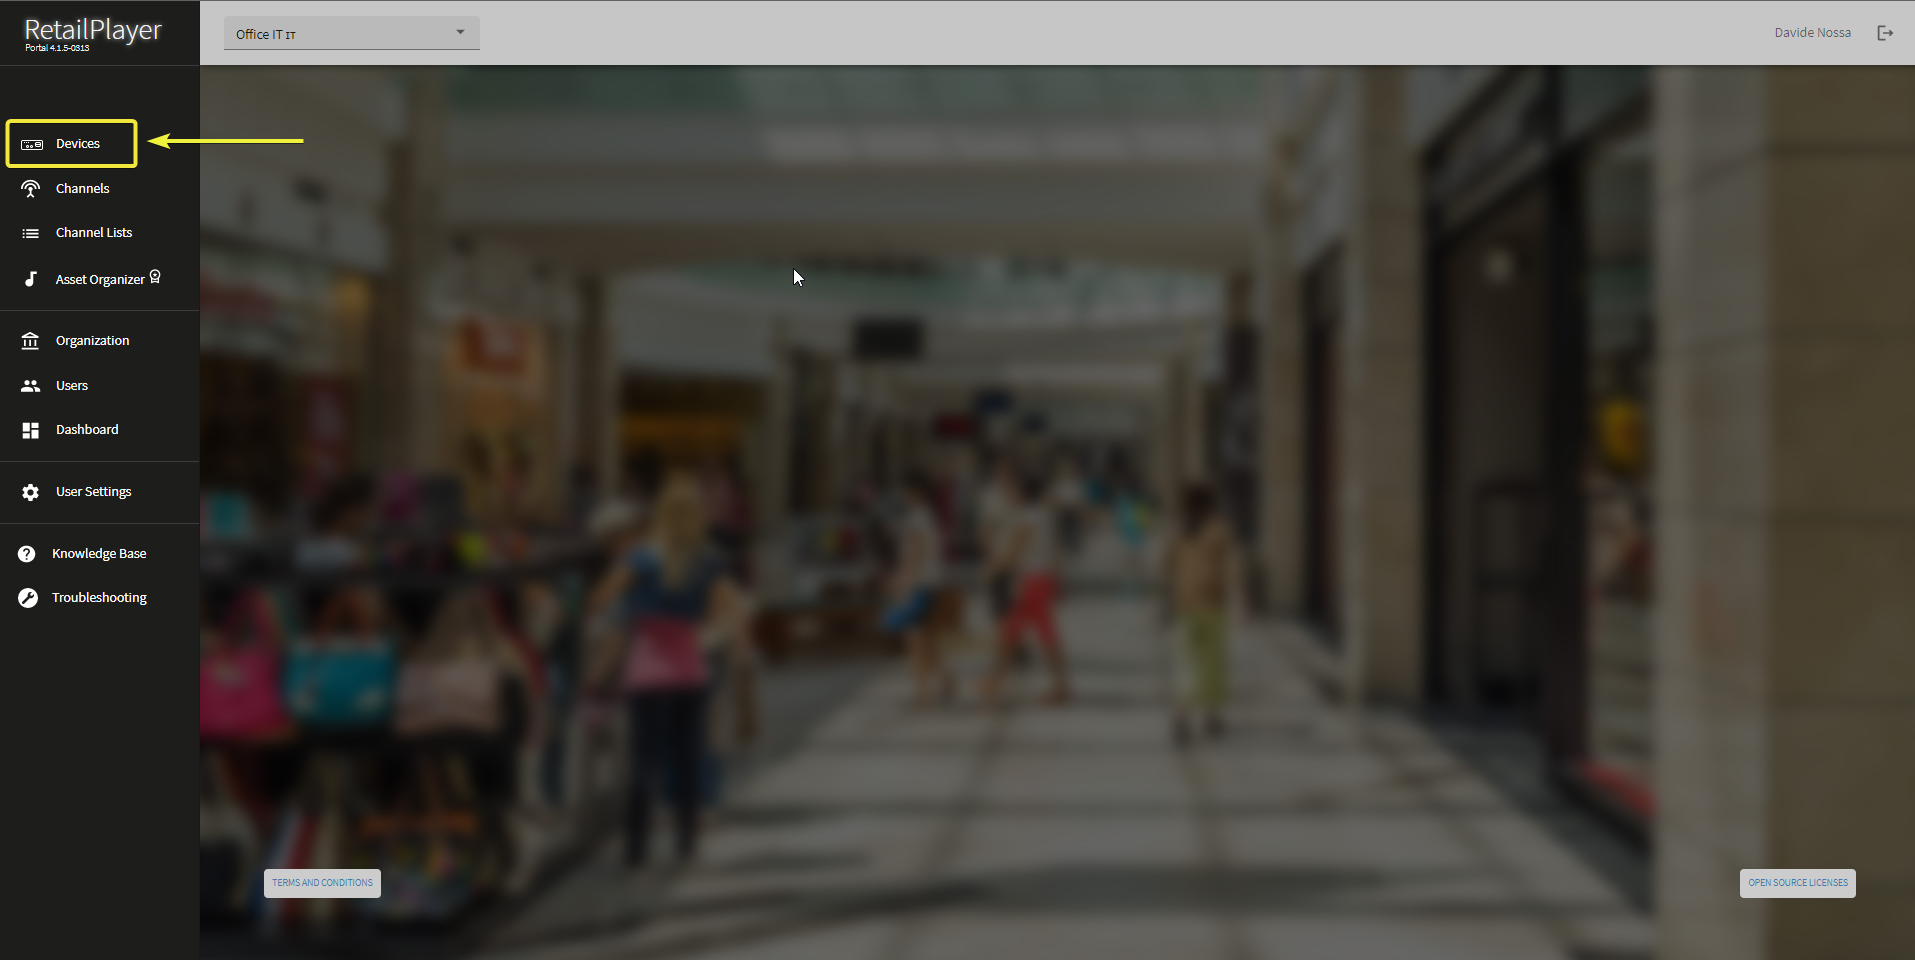
Portal Dashboard -
In the Device List, click on the '+' in the upper right corner to add a new RetailPlayer device
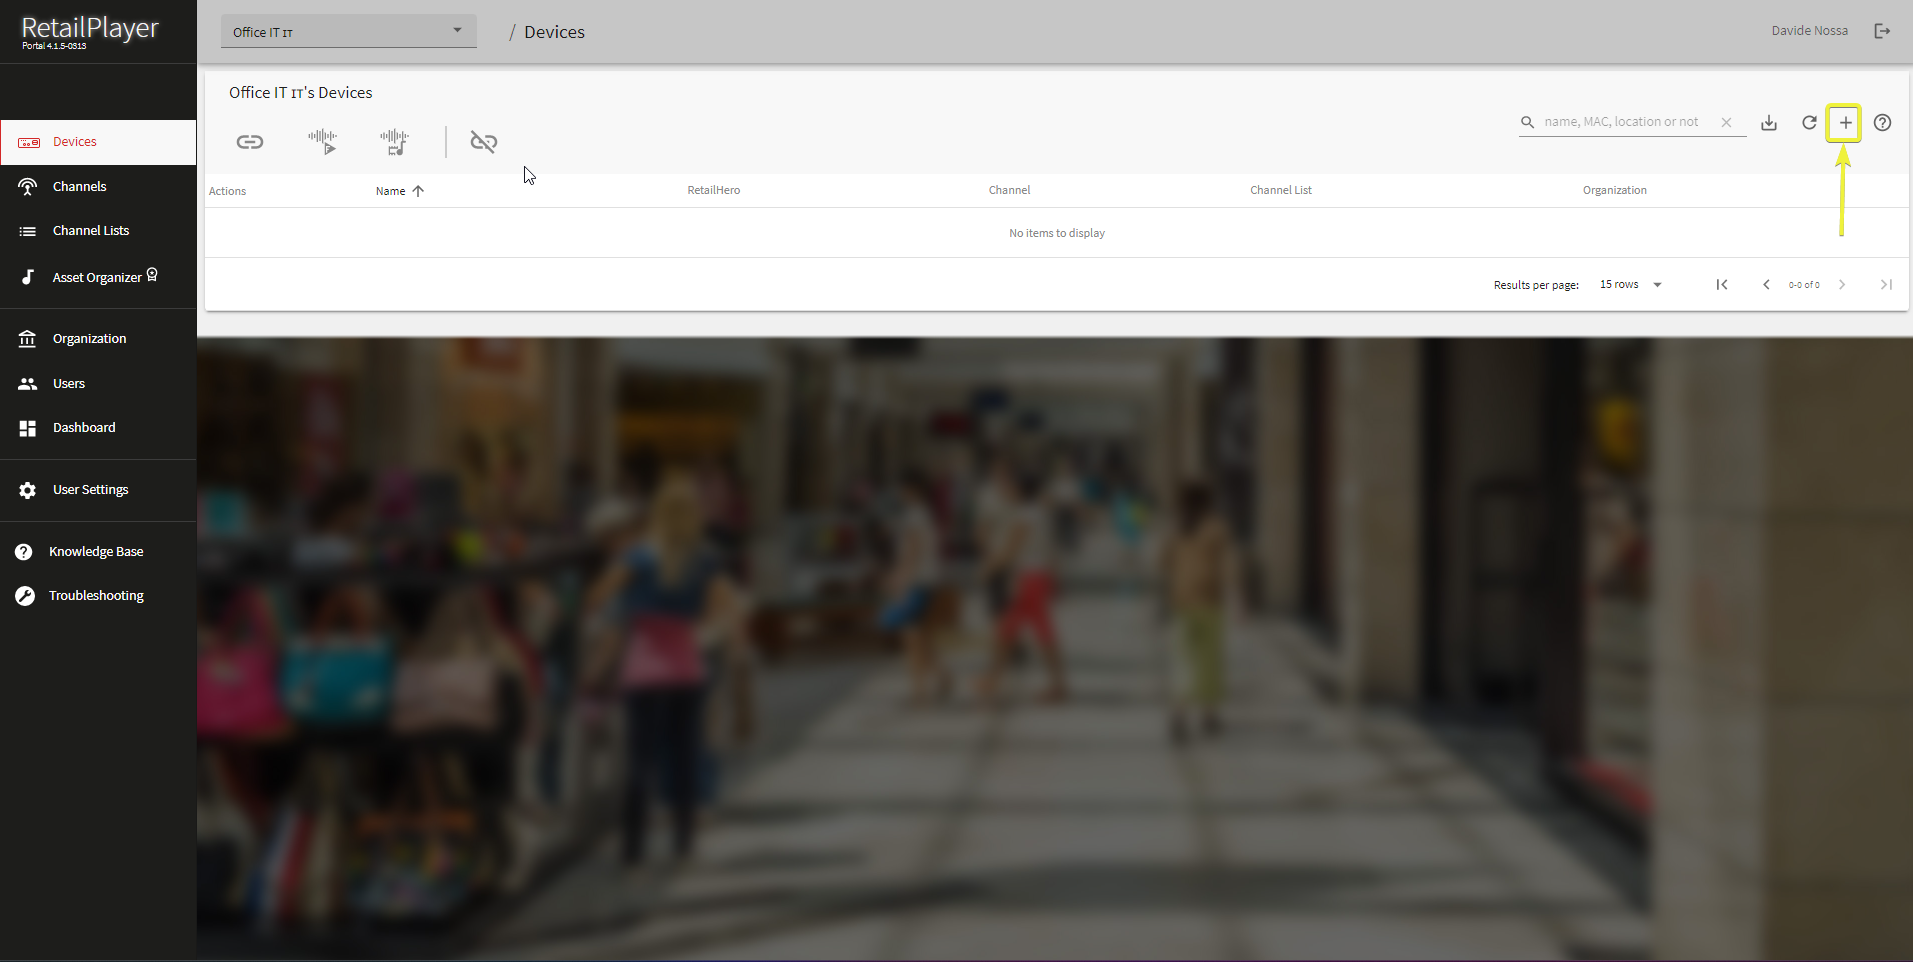
Device List - Add new device -
The device registration wizard opens: Fill in the MAC Address and assign the new device a name, then follow the rest of the wizard items according to your needs.
NOTE: When the wizard prompts to select a channel and a channel list you can leave these fields empty in case you haven’t created yet none of them.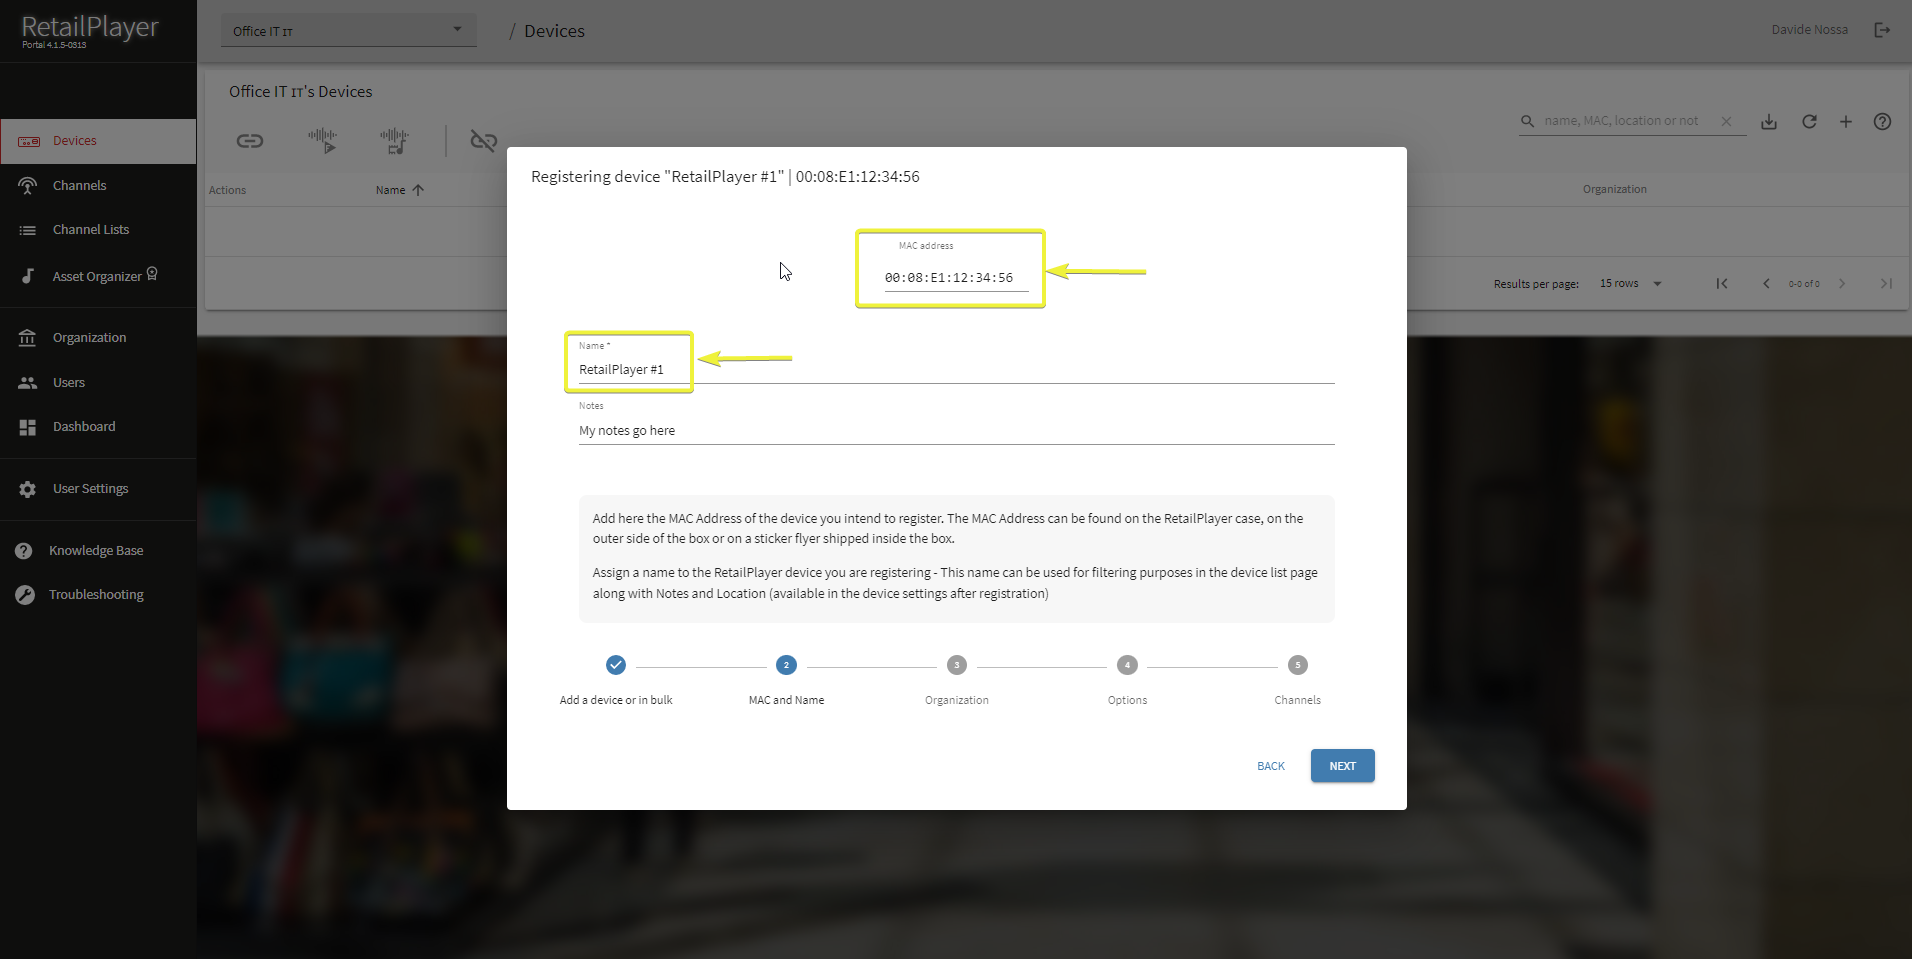
Device Registration Wizard -
When the registration is complete, the device settings page is shown. If the RetailPlayer device is connected to the network in a few minutes it will be shown as ONLINE and the STATUS will present relevant information. The device now can be controlled and configured by the Portal.
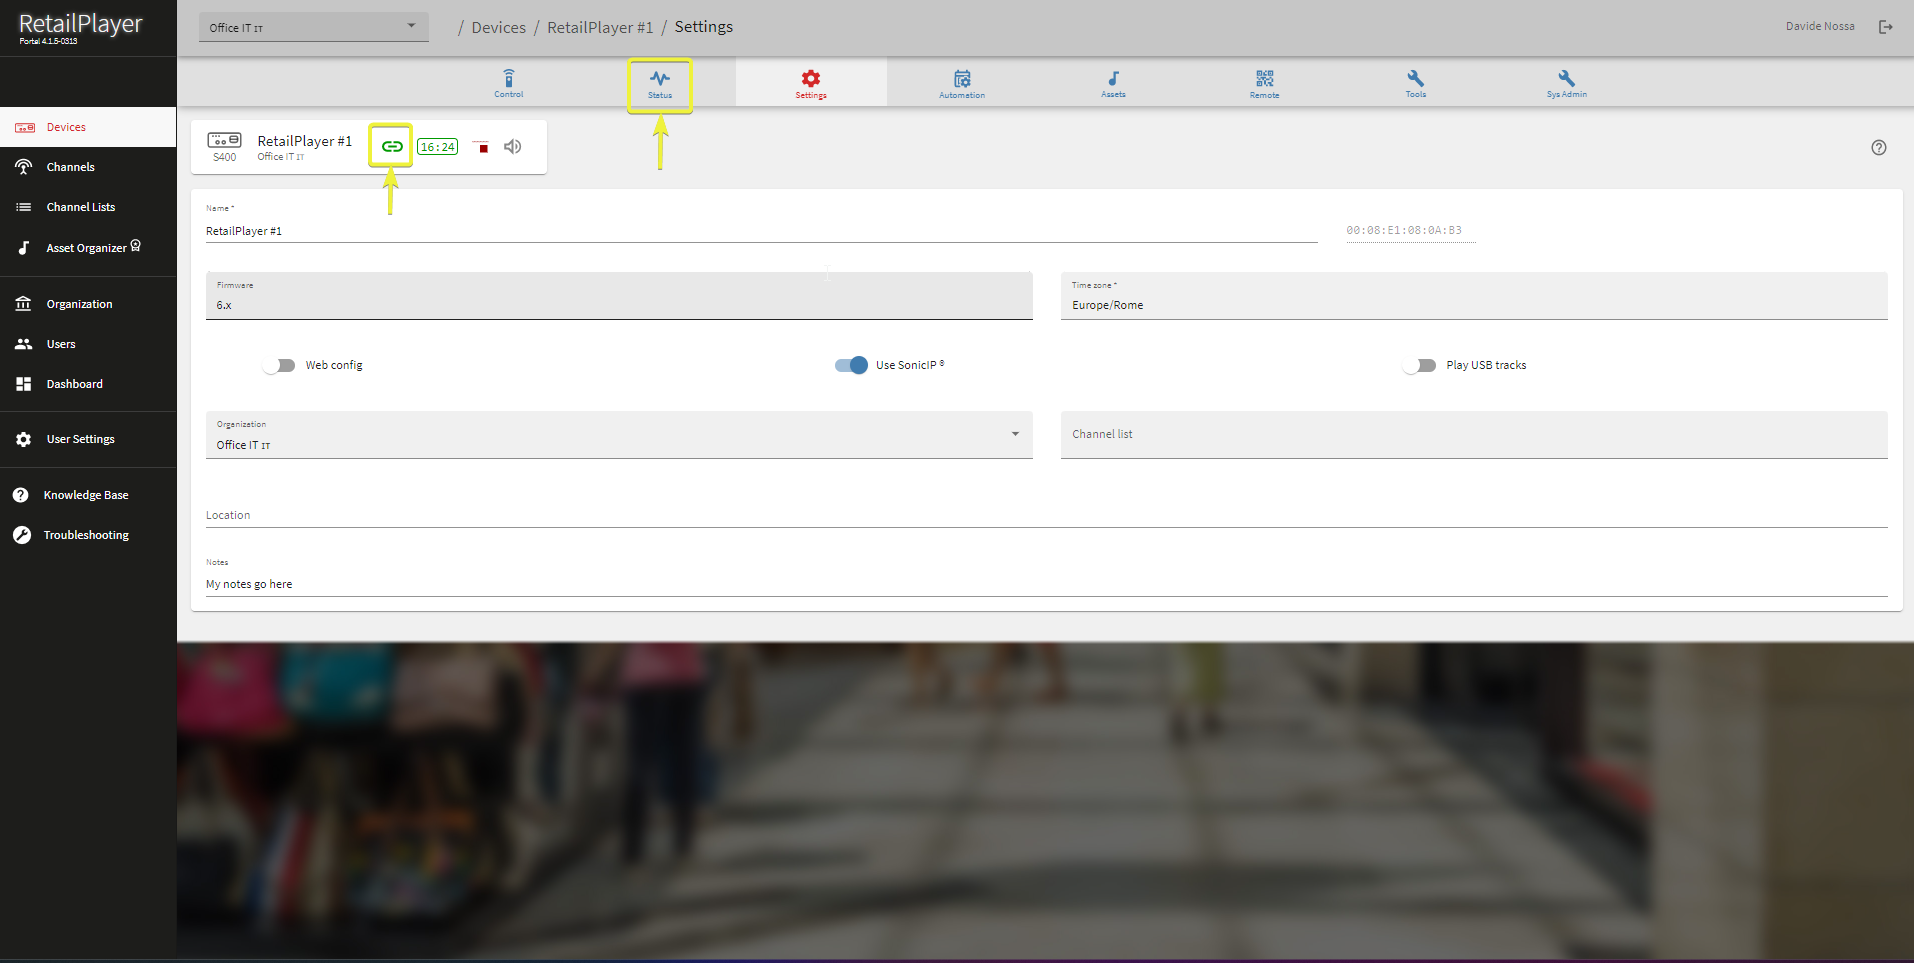
Device Settings 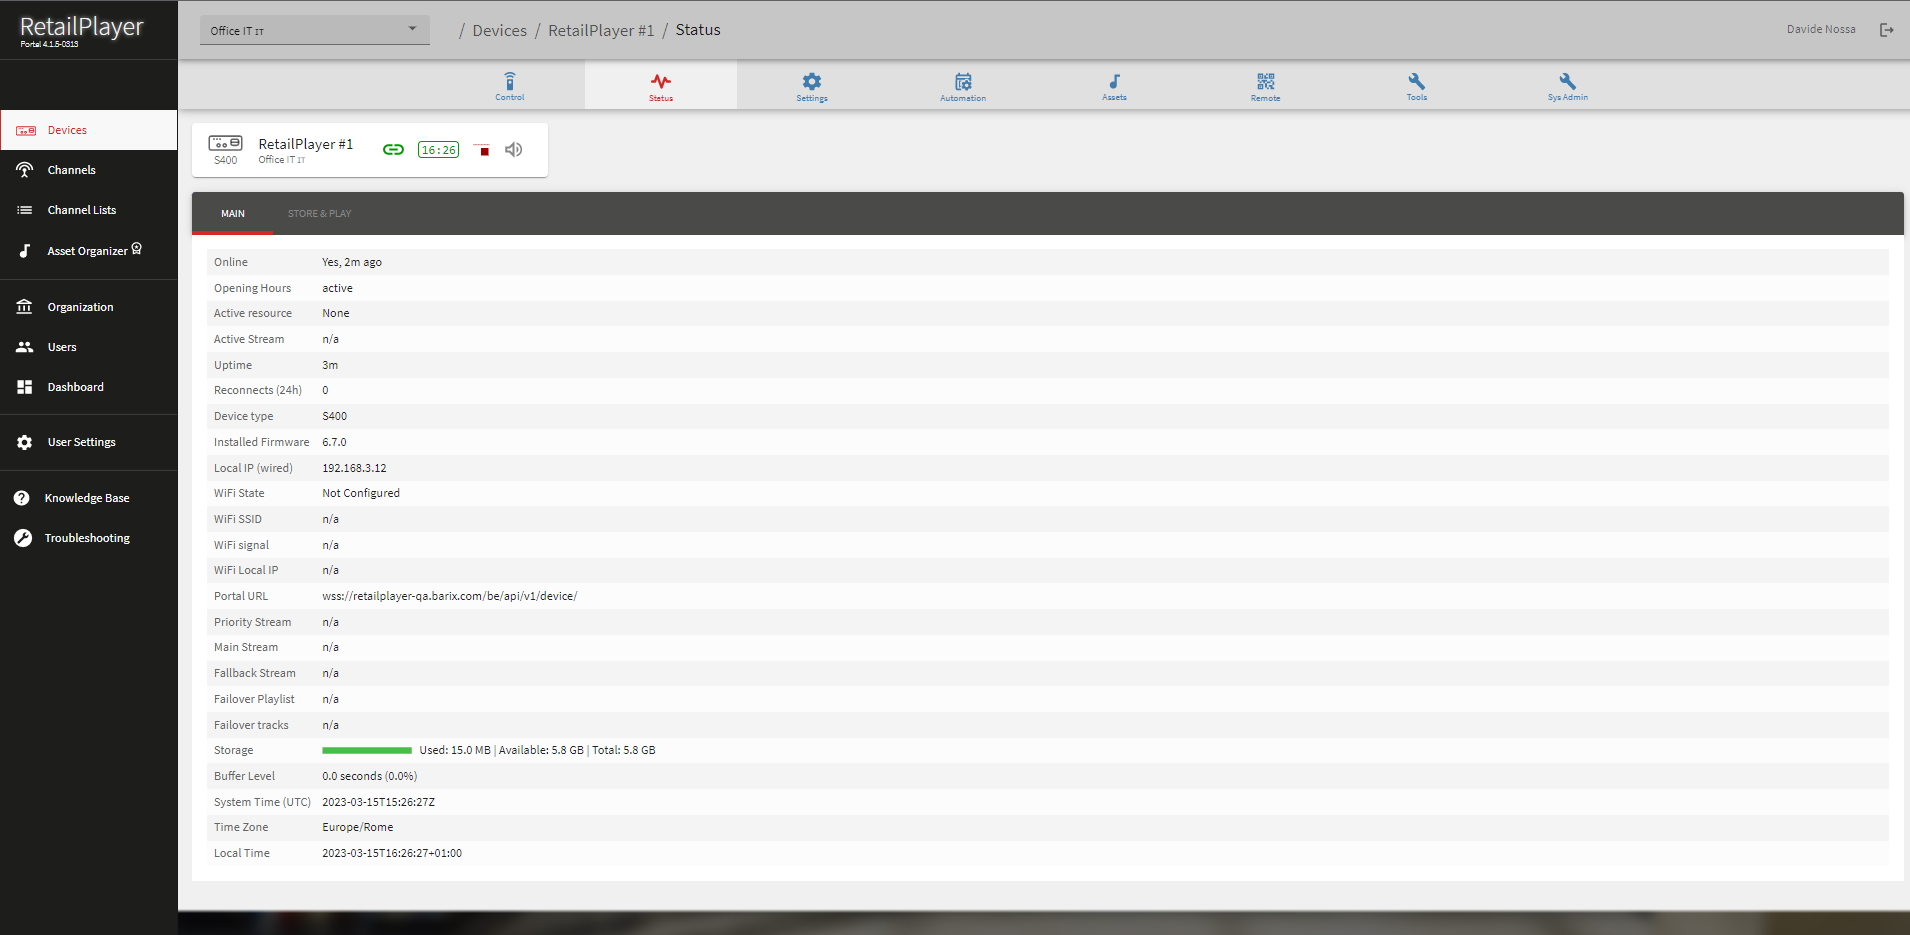
Device Status -
Now it’s time to setup our Barix Radio channel to be assigned to the device for it to play! Locate the CHANNELS section on the side bar menu on the left and click on the '+' to add a new channel in your organization
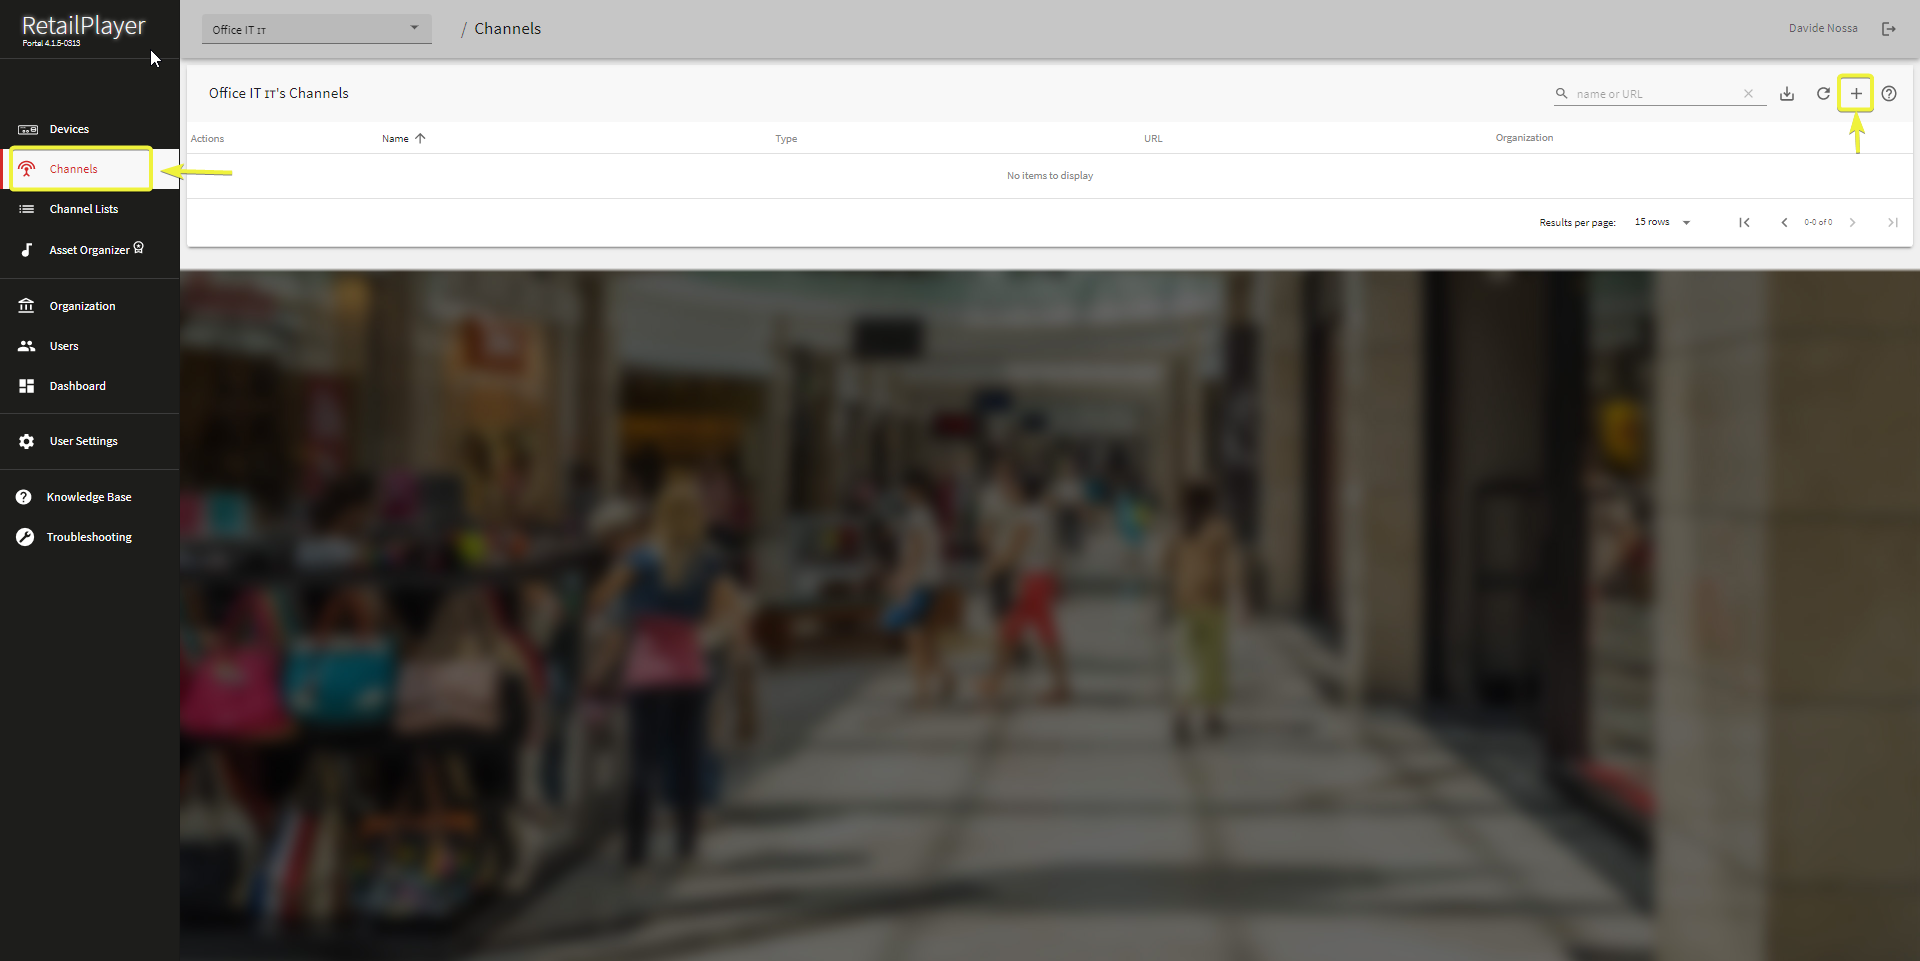
Channels -
The channel creation wizard opens: select the organization the channel belongs to, assign a name to the channel (i.e. 'Barix Radio), Select the type of channel you intend to create between store and play (play files downloaded from a fileserver) or a stream (connect to a streaming server). In our example here, Barix Radio is a stream. Select stream and continue filling in Barix Radio URL in the MAIN STREAM parameter (https://www.barix.com/radio.m3u) - Confirm the channel creation.
NOTE: There is no limit in the number of channels you can add in the RetailPlayer Portal.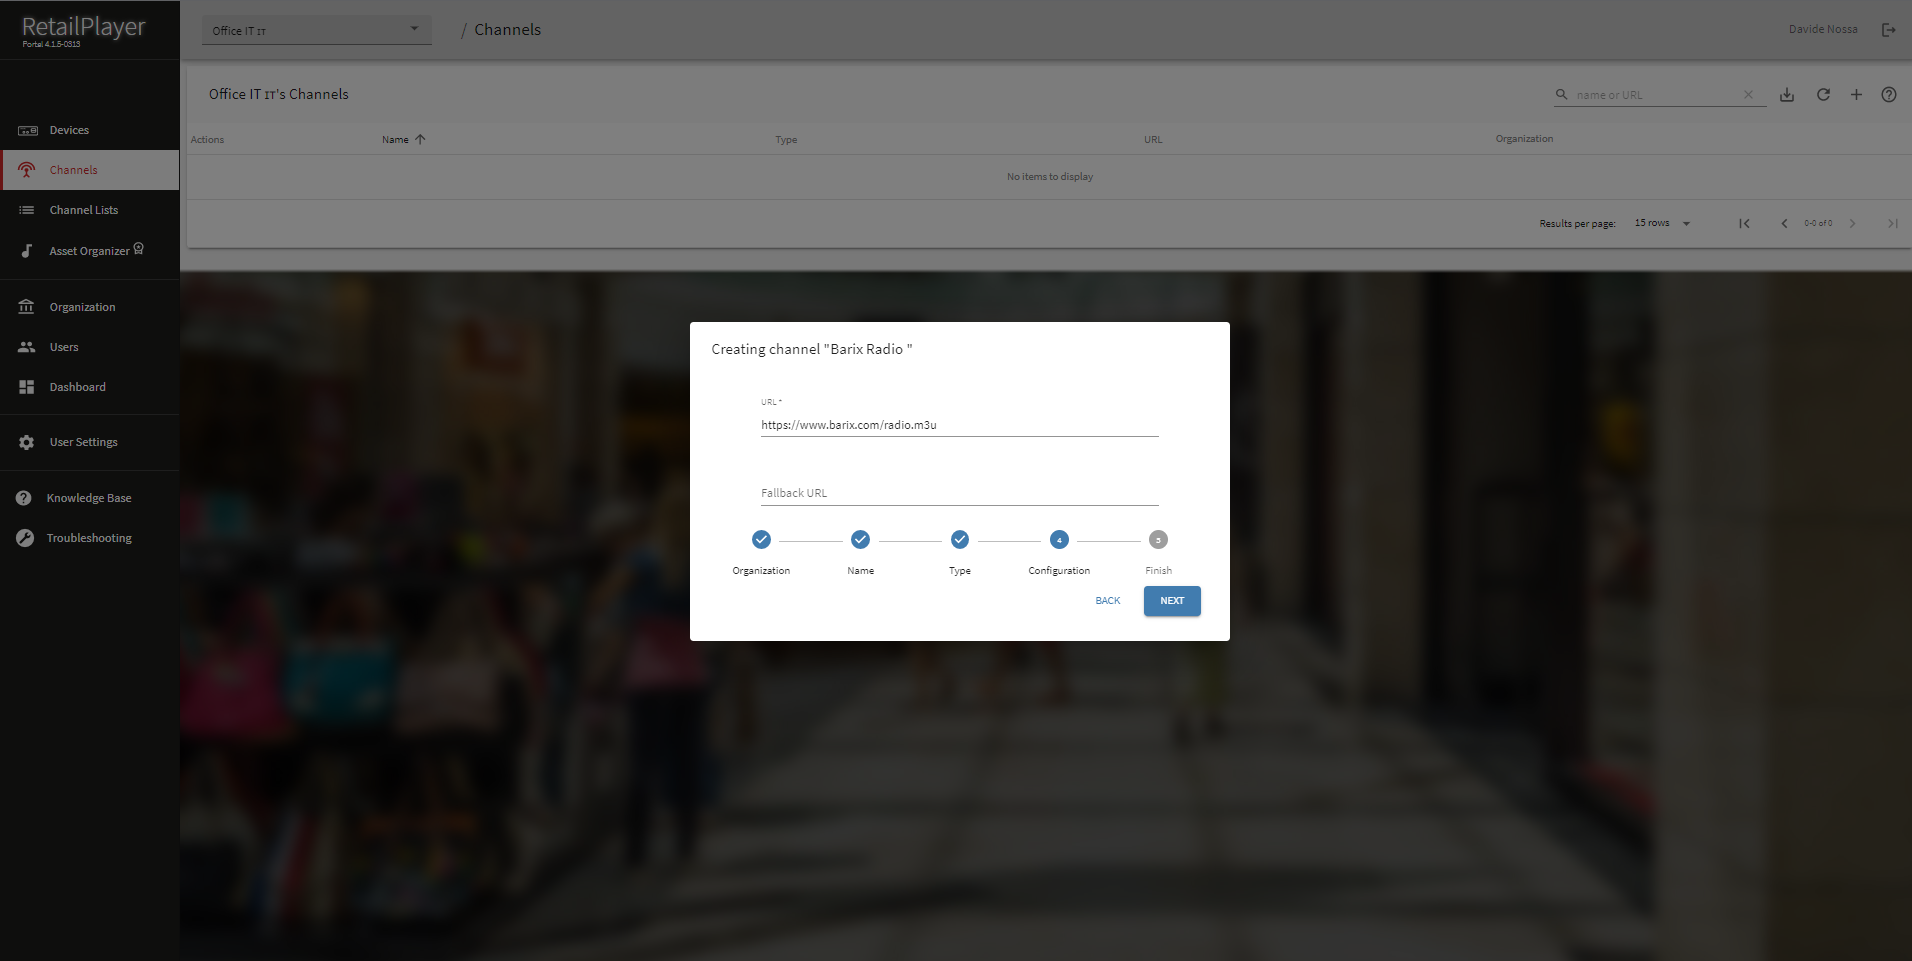
Channel Creation Wizard -
Now it’s time to add our channel(s) into a channel list that can be later be assigned to our RetailPlayer device. Locate the CHANNEL LISTS section and, like we’ve done for devices and channels, click on the '+' to open the Channel List creation page. In this page:
-
Give the channel list a name
-
Select the channel(s) that has to be included in the channel list
-
Save
-
After saving it’s also possible to upload fail-over tracks, an highly useful fail-over mechanism system when playing streams that stores tracks in the local memory onto the RetailPlayer device, ready to play in the event of a network disconnection. This ensures that music always plays in the location. A maximum of 200 failover tracks can be uploaded in the Portal for each channel list.

Channel List Creation page
-
-
Now that we have the channel list created, without leaving this page, click on the ASSIGN DEVICES - This opens up a dialogue that allows the selection of devices registered in the same ORG the user is operating into. Select the device we just registered and click on Save.
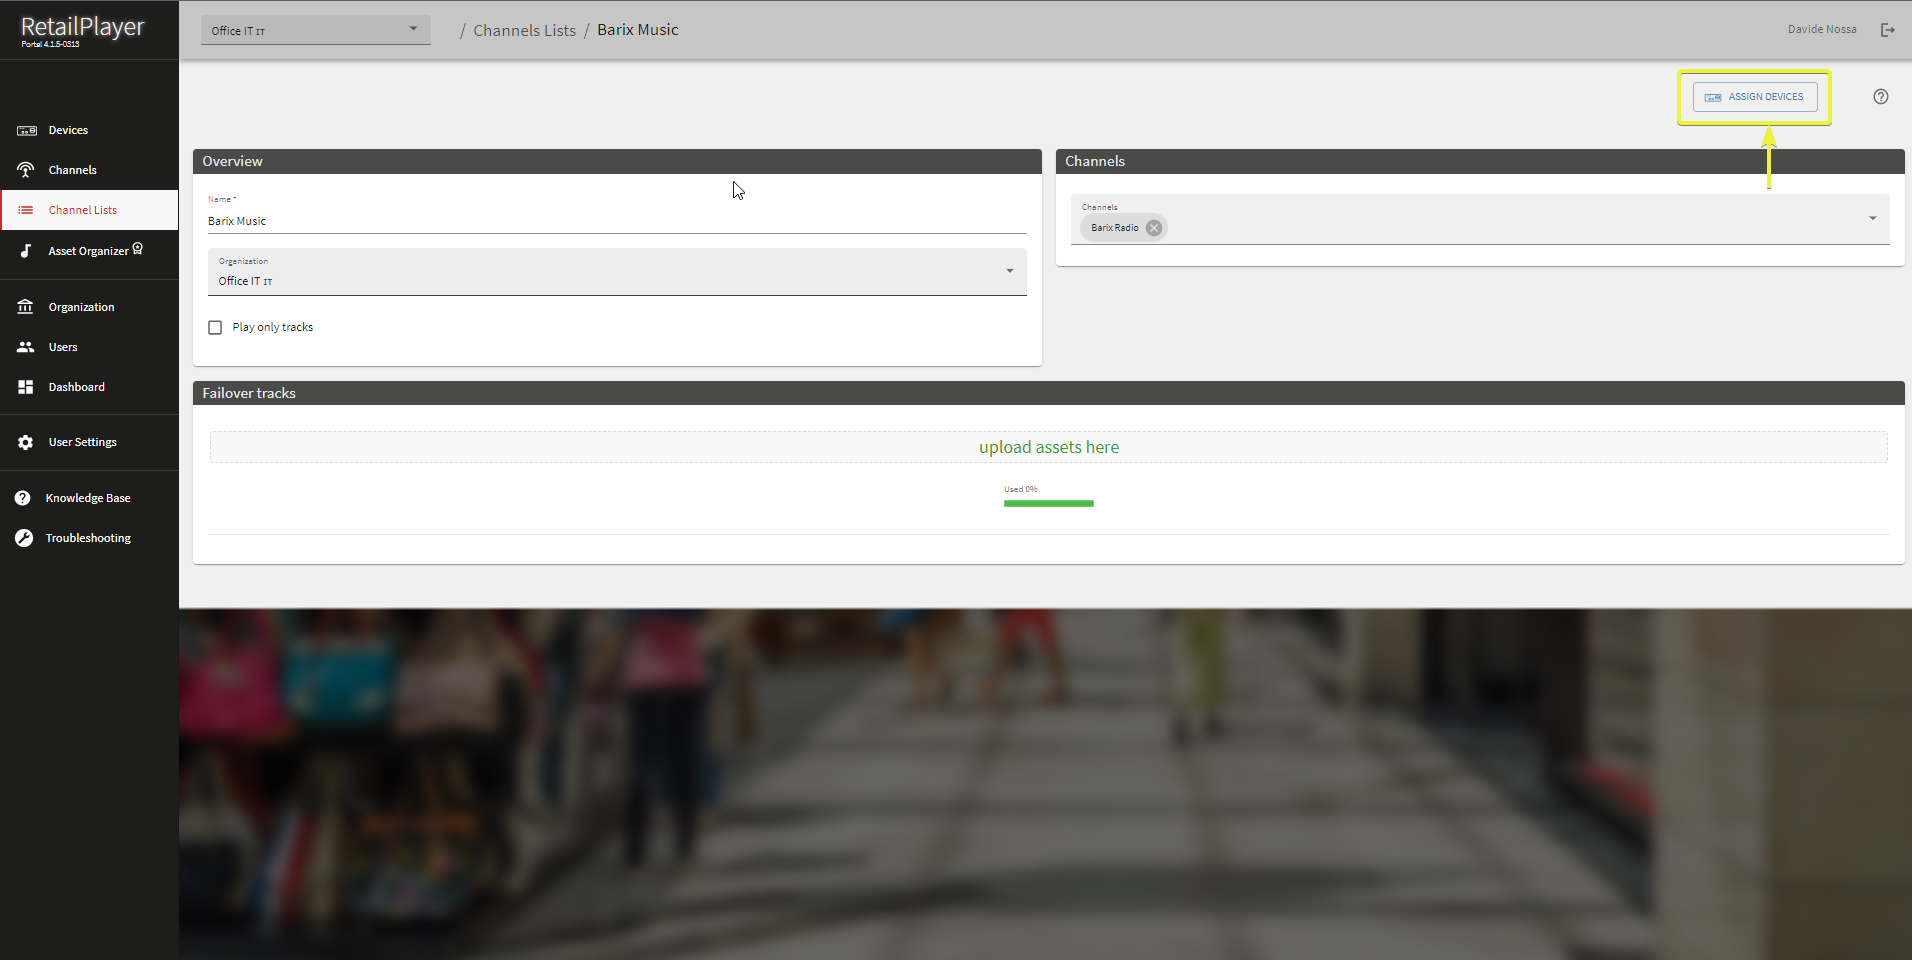
Assign channel list to devices 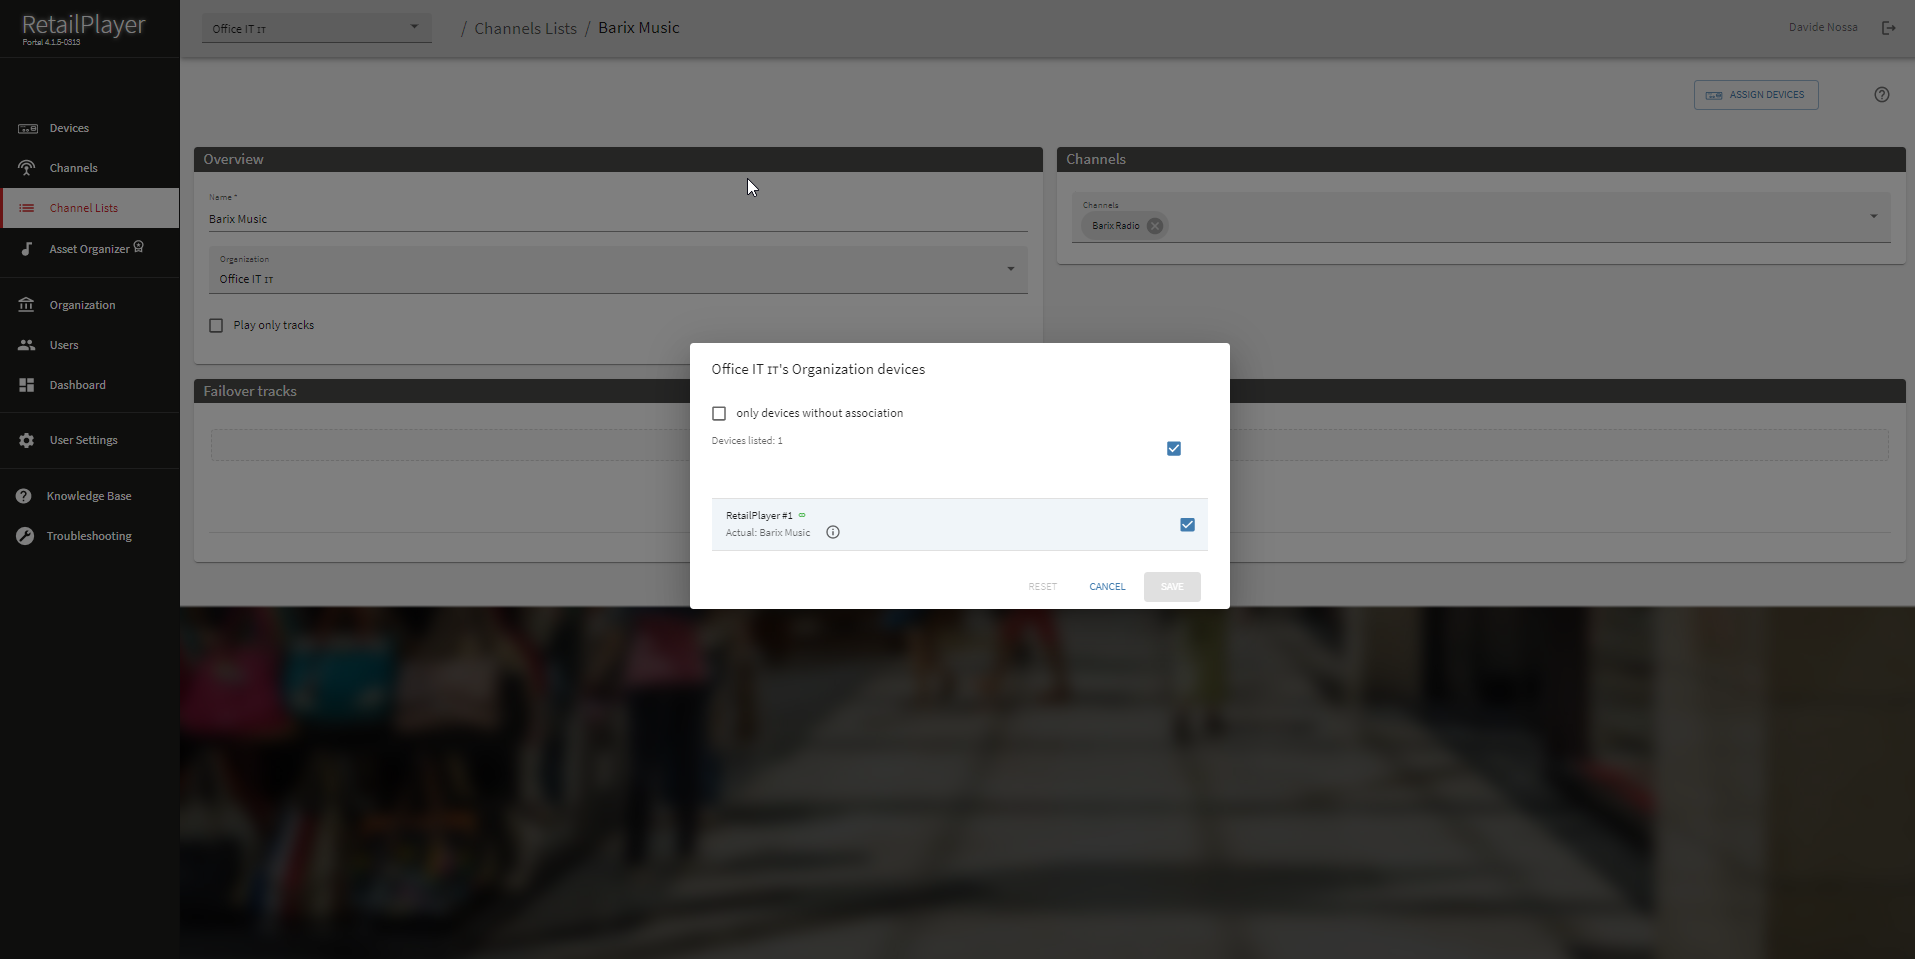
Assign channel list to devices -
At this point the channel present in the channel list assigned to the device will start to play after a few seconds. You can monitor the new status in the device status page or by looking at the useful widgets on the device list
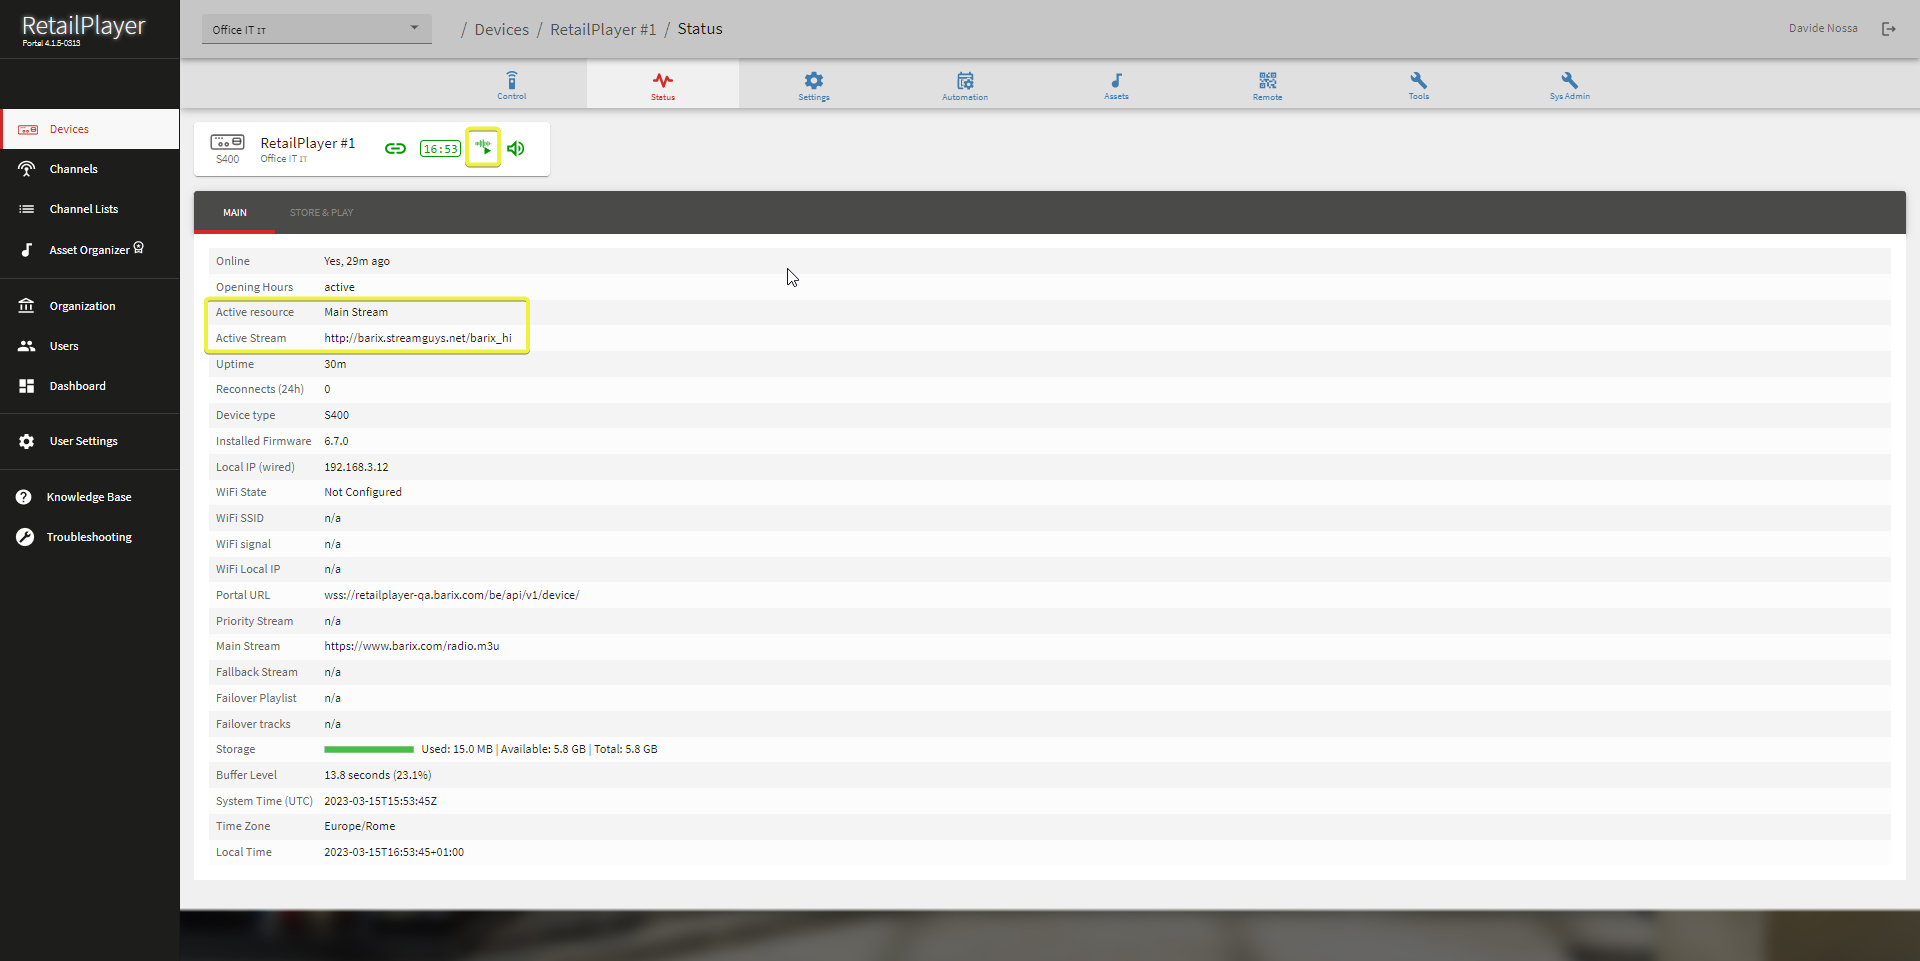
Device status - notice the ‘Active Resource' and ‘Active Stream’
Done. Enjoy this and many other features of RetailPlayer. Consult the extended user manual for more information.
Always feel free to contact support@barix.com to receive assistance from our expert personnel.
Compliance and further Information
This equipment has been tested and found to comply with the limits for a Class B digital device, pursuant to part 15 of the FCC Rules. These limits are designed to provide reasonable protection against harmful interference in a residential installation. This equipment generates, uses and can radiate radio frequency energy and, if not installed and used in accordance with the instructions, may cause harmful interference to radio communications. However, there is no guarantee that interference will not occur in a particular installation. If this equipment does cause harmful interference to radio or television reception, which can be determined by turning the equipment off and on, the user is encouraged to try to correct the interference by one or more of the following measures:
-
Reorient or relocate the receiving antenna.
-
Increase the separation between the equipment and receiver.
-
Connect the device into an outlet on a circuit different from that to which the receiver is connected.
-
Consult the dealer or an experienced radio/TV technician for help.
Safety and precaution recommendations apply. Find them in the download section at www.barix.com

Find your distributor on this list for more hardware.
For questions that are extending the documentation, feel free to contact us on:
International: +41 434 33 22 22
USA: +1 866 815 0866
Email: support@barix.com
All information and the use of this product including all services are covered under the Barix Terms & Conditions and our Privacy Policy. Please follow the Safety and Precaution Recommendations. Barix is a ISO 9001:2015 certified company. All rights reserved. All information is subject to change without notice. All mentioned trademarks belong to their respective owners and are used for reference only.