Introduction
Welcome to the AudioPoint configuration manual! this document should give a detailed view of how to configure the AudioPoint device and how to use it as a solution. It extends the Quick Install guide which only provides a short overview on how to get the AudioPoint up and running with the default values. In this document, you will find information on how to change the default values and customize your solution. You will also find some information about advanced features and more.
Features
-
SonicIP© for easy accessing the web interface
-
Static IP or DHCP (default) capable
-
Detectable by the „Barix Discovery tool“
-
Web interface for configuration of the device
-
Manual and automatic firmware update
-
Capture of two mono signals from RCA connectors and separated streaming
-
Fast audio encoding mu-law at 24 kHz
-
Low-latency streaming to AudioPoint App (iOS and Android)
-
Live information about audio and streaming status on the homepage
Supported Hardware
AudioPoint runs on an AudioPoint device, even though these are different solutions. For using AudioSpread you need to have at least firmware version 1.9.4 of the AudioPoint loaded. Everything below will not support AudioSpread!
Ordering Numbers:
-
2017.9217P - Barix AudioPoint 3.0 encoder unit with a license for 50 simultaneous subscribers
-
2017.9217 - AudioPoint EU Package
-
2017.9218 - AudioPoint US Package
-
2017.9219 - AudioPoint UK Package
-
2017.9220 - AudioPoint No PSU Package
-
2017.3135 - AudioPoint 250 CL supports 250 clients total
Setup AudioPoint system
This is also described in the Quick Install Guide: https://help.barix.com/audiopoint/documentation
To get AudioPoint up and running, you will need the following:
-
AudioPoint device
-
Wifi router/access-point
-
Smartphone (iOS or Android)
Setup your wifi first. AudioPoint will work with most Wifi Systems. If you use a Wifi Router, you can connect the AudioPoint directly to the router over Ethernet, otherwise, connect the device to the same LAN the Access-Point is connected to! Be aware, that the Wifi System is an important part of your AudioPoint setup, so if you have problems with the performance, check our performance-sheet with the most frequent problems and solutions: Bottlenecks and Performance optimization
After your Wifi is set up, connect your AudioPoint device and power it up! The device will work out of the box, with any configuration needed.
Download the AudioPoint App to your smartphone:
-
iOS: "AudioPoint", https://apps.apple.com/us/app/audiopoinAudioSignaget/id1508163144
-
Android: "AudioPoint", https://play.google.com/store/apps/details?id=com.barix.audiopoint&hl=en
After you have downloaded the App, connect the phone to the wifi you set up earlier. After that, start the app and you will see the 2 default channels "Local_left" and "Local_right"
Device configuration
Accessing the Device
To access the Web Interface of the device, you have to connect it to the local network and you will need to find out the IP-Address of the device! Plug-in the Ethernet cable, the power cable and connect your headphones to the headphone jack on the front plate. after some time, the device will announce the IP-Address received from the DHCP Server (or from the router) over the connected headphones. If you don't have any headphones available or the IP-Address is never announced (it can be disabled in the settings) you will have to download the Barix Discovery tool to find the device on the network. Download the discovery tool from https://www.barix.com/downloads. Be aware, that you need to have the Java Runtime Environment installed since the discovery tools is a Java application and your PC needs to be on the same network than the AudioPoint device.
After you received the IP-Address of the Device, either over SonicIP© (over the headphones) or over the Barix Discovery Tool, you can access it by entering the IP-Address into any browser (Chrome or Firefox are preferred) like this: http://192.168.1.15. You will be prompted to put in a username and password:
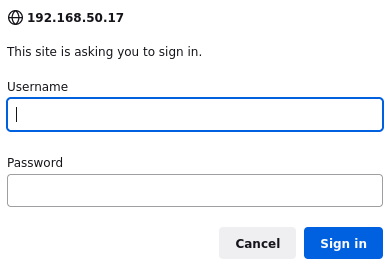
You can find the login credentials on the back of the device on a white sticker. the password is unique per device and can be changed in the configuration while the username will always be admin!
Password information
Be aware, that Barix is not able to restore any password if the sticker is not readable or is lost!
If you reset the device, the password will be reset to the factory default one (the one on the sticker).
Configuration
The AudioPoint solution runs out of the box without any configuration needed. If you want to change default configuration and customize the solution, enter the device and go to the CONFIGURATION section on the main menu on top of the page. Below you see all possible settings with a short description.
Channel Settings
The AudioPoint channel settings are the main application settings. An AudioPoint device can provide up to 2 channels, one on the left and one on the right RCA input. To change a channel, select it and click on "Edit Channel".
Default Channels:
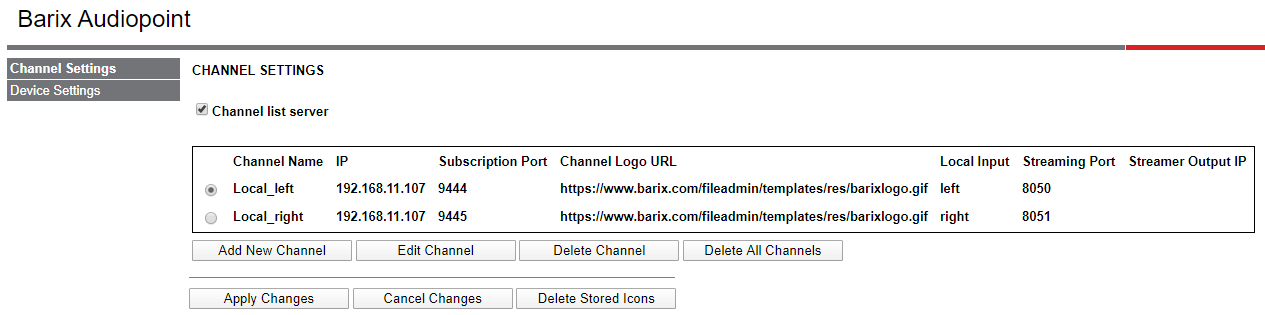
Enable/Disable channel distribution:
|
Channel list server |
Enable or Disable the distribution of the channels over the network. The subscription will still be possible through QR-Code scanning even when the channel listing is disabled but the channel will not show up on the AudioPoint App. Default: "enabled |
|---|
Edit Channel Settings:
|
Channel Name |
Name of the AudioPoint channel. Shows also on the AudioPoint App. Also needed to subscribe through QR-Code scanning |
|---|---|
|
IP Address and Port |
Define the IP-Address and port, where this channel can be subscribed to. The IP-Address is usually the one of the AudioPoint device and can only be changed when the Local Input is set to "None". Changing this value can be used for special installation with special network requirements. The Port must be unique and cannot be used by any other channel on the same device!
|
|
Local Input |
Selection of the analog Audio Input Port (right or left). |
|
Streamer Output IP Address |
Only visible when "Streamer Output" is External! It is used to set a custom, fixed destination for the channel. |
|
Streaming Port |
|
|
Frame Buffer Size |
Define the amount of frames that are buffered on the end device! per second there are 100 frames transmitted to the device or 1 frame comes every 10ms.
|
|
Channel Logo URL |
URL to an image that is shown on the app instead of the default Barix app |
|
Browse Logo File |
Use this to load a custom image to the device. |
|
Logo |
Shows the current Logo |
Device Settings
In the "Device Settings" menu, you find all settings to manage the device itself
Audio Settings:
|
Input Level |
Set the device audio input level according to the current audio source level.
|
|---|
Network Settings:
|
Use SonicIP |
If set to "yes", the device will announce its IP address over the audio output on startup.
|
|---|---|
|
SonicIP Volume |
Sets the volume at which the SonicIP® will be announced at boot.
|
|
Protocol |
Select "DHCP" for automatic assignment of IP address, Netmask, Gateway and Primary/Alternative DNS.
|
|
Current IP Address |
Only visible when "Protocol" is set to DHCP! shows the current IP-Address, set by the DHCP-Server.
|
|
Current Netmask |
Only visible when "Protocol" is set to DHCP! shows the current Netmask, set by the DHCP-Server.
|
|
Current Gateway IP Address |
Only visible when "Protocol" is set to DHCP! shows the current Gateway Address, set by the DHCP-Server.
|
|
Current Primary DNS |
Only visible when "Protocol" is set to DHCP! shows the current DNS Address, set by the DHCP-Server.
|
|
IP Address |
Only visible when "Protocol" is set to Static! Set a static IP-Address for the device. Default: "192.168.1.100" |
|
Netmask |
Only visible when "Protocol" is set to Static! Set a static Netmask for the device. Default: "255.255.255.0" |
|
Gateway IP Address |
Only visible when "Protocol" is set to Static! Set the IP-Address of the Network Gateway. Default: "192.168.1.1" |
|
Primary DNS |
Only visible when "Protocol" is set to Static! Set the IP-Address of the Primary DNS Server Default: "" |
|
Alternative DNS |
Only visible when "Protocol" is set to Static! Set the IP-Address of the Secondary DNS Server Default: "" |
|
Host/Server Name |
When "DHCP" is selected as protocol, you can optionally set a DHCP Host Name to be sent in the DHCP request. This name is also used as the device's Barix AudioPoint Name; any change made to the Barix AudioPoint Name will also update the DHCP Name. DHCP name also shows in the Barix Discovery tool. Default: "AudioPoint-3.0" |
|
Web Server Port |
Defines the port where the web UI of the Barix AudioPoint device can be reached.
|
|
Syslog Address |
Enter the destination IP address for Syslog messages sent by the Barix AudioPoint via the SYSLOG command.
|
Time Settings:
|
Timezone |
Selection of the Timezone the device will use as System time. Default: "Universal" |
|---|---|
|
NTP Status |
Enable or Disable the use of NTP Servers. If disabled, the device will use the internal time Default: "Enabled" |
|
NTP Server 1 |
Only visible when "NTP Status" is enabled. Set a custom time server. Default: "1.barix.pool.ntp.org" |
|
NTP Server 2 |
Only visible when "NTP Status" is enabled. Set a custom time server. Default: "2.barix.pool.ntp.org" |
|
NTP Server 3 |
Only visible when "NTP Status" is enabled. Set a custom time server. Default: "3.barix.pool.ntp.org" |
Security Settings:
|
Reboot Function |
Enable or disable the "Reboot" function through the Reset button and from the Web Interface REBOOT tab.
|
|---|---|
|
Reset Factory Defaults |
Enable or disable the "Reset Factory Defaults" function through the Reset button and through the Web Interface "DEFAULTS" tab. Default: "enabled" |
|
Web Update Function |
Enable or disable the functionality to update the device over the UPDATE tab on the Web Interface
|
|
Automatic Remote Update |
Enable or disable the automatic update of the device.
|
|
Web UI Password |
Only visible when no password is set!
Default: "invisible" |
|
Old Password |
Visible only when a password is set! Needs to be set with the current password, to change the password. Default: "" |
|
New Password |
Visible only when a password is set! A new password can be set (up to 25 characters) or can be left blank to remove the password from the device. "Old Password" needs to be set to change the password. Default: "" |
Status page & Logs
The Status page (STATUS Tab on the Main Menu) shows all information about the device. In addition, you can see or download the system log on the LOGS Tab. In a support case, send this page together with the channel configuration page to the barix support!
QR-Code Scanning
An AudioPoint channel can be provided through the App directly or you can provide a QR-Code with a link to the Channel. The QR-Code can be scanned inside the App and will be played. This can be very handy if you want your customer to listen to a channel on at a specific time or place.
To use this feature you will need to know:
-
the IP-Address of the device
-
the Channel Name
-
the Subscription Port of the Channel
create the URL for the QR-code with the information above like this: audiopoint://<ip-address>:<port>/<channel-name>
For example: audiopoint://192.168.1.105:9444/Local_left
After you have the URL for your AudioPoint channel, create a QR-Code based on that URL. You should now be able to scan the code in the AudioPoint App to subscribe to the channel.
Technical Information
|
Codec |
PCM uLaw 24khz |
|---|---|
|
Network Transport |
UDP/RTP |
|
Min delay (Analog to Analog) |
80ms, see Bottlenecks and Performance optimization |
|
Max delay (Analog to Analog) |
250ms, see Bottlenecks and Performance optimization |
|
Max Subscriptions |
50 or 250 (with extended License) |
|
Max Channels |
2 - left and right RCA input |
Reset & Factory Defaults
Through the reset button:
Press the reset button on the front panel of the device for at least 8 seconds. After releasing the button, the device will reset to factory defaults. (This can take some minutes)
Through the Web Interface:
Enter the Web Interface of the device and navigate to the DEFAULTS tab on the main menu! Click on Factory defaults to reset the device. (This can take some minutes)
Attention
Be aware that the resetting functionality can be disabled in the settings. If so, neither the reset button or the Web Interface reset will work! If you want to reset your device you will need to disable this function first.
Resetting your Device will also reset the Password. See the default password on the backside of your AudioPoint Device.
Update your device
The AudioPoint device will update itself by default, as soon there is a new version available. There needs to be an Internet connection to use the Automatic update functionality. You can disable this feature in the settings.
You can manually update the device over the Web Interface through the tab UPDATE. Download the latest update on https://www.barix.com/downloads. Click on "Please click here to start the update" and select the downloaded update file (.tar)
Device LED States
Below you see the possible state of the LEDs on the AudioPoint device front plate and their meaning.
|
State/LED |
LED 1 (Left) |
LED 2 (Right) |
|---|---|---|
|
Off |
The device is not powered on |
AudioPoint Server (service) is not running! |
|
Red solid |
The Device is booting up
|
- |
|
Red blinking |
- |
|
|
Green solid |
The device is up and running |
Analog Audio connected. Solid because no subscribers connected! |
|
Green blinking |
- |
Analog Audio connected. Blinking because >0 subscribers connected! |
|
Orange solid |
- |
No Analog Audio connected or AudioLevel is 0. Solid because no subscriber is connected |
|
Orange blinking |
- |
No Analog Audio connected or AudioLevel is 0. Blinking because >0 subscribers connected |
The checks are currently only done on the left input (white). this will be changed in the future.
Compliance and further Information
This equipment has been tested and found to comply with the limits for a Class B digital device, pursuant to part 15 of the FCC Rules. These limits are designed to provide reasonable protection against harmful interference in a residential installation. This equipment generates, uses and can radiate radio frequency energy and, if not installed and used in accordance with the instructions, may cause harmful interference to radio communications. However, there is no guarantee that interference will not occur in a particular installation. If this equipment does cause harmful interference to radio or television reception, which can be determined by turning the equipment off and on, the user is encouraged to try to correct the interference by one or more of the following measures:
-
Reorient or relocate the receiving antenna.
-
Increase the separation between the equipment and receiver.
-
Connect the device into an outlet on a circuit different from that to which the receiver is connected.
-
Consult the dealer or an experienced radio/TV technician for help.
Safety and precaution recommendations apply. Find them in the download section at www.barix.com

Find your distributor on this list for more hardware.
For questions that are extending the documentation, feel free to contact us on:
International: +41 434 33 22 22
USA: +1 866 815 0866
Email: support@barix.com
All information and the use of this product including all services are covered under the Barix Terms & Conditions and our Privacy Policy. Please follow the Safety and Precaution Recommendations. Barix is a ISO 9001:2015 certified company. All rights reserved. All information is subject to change without notice. All mentioned trademarks belong to their respective owners and are used for reference only.