This document describes how to trigger a notification from a Barionet 400 device using Informacast notification platform
Preparation
In order to perform the operation described in this How To is necessary to have:
-
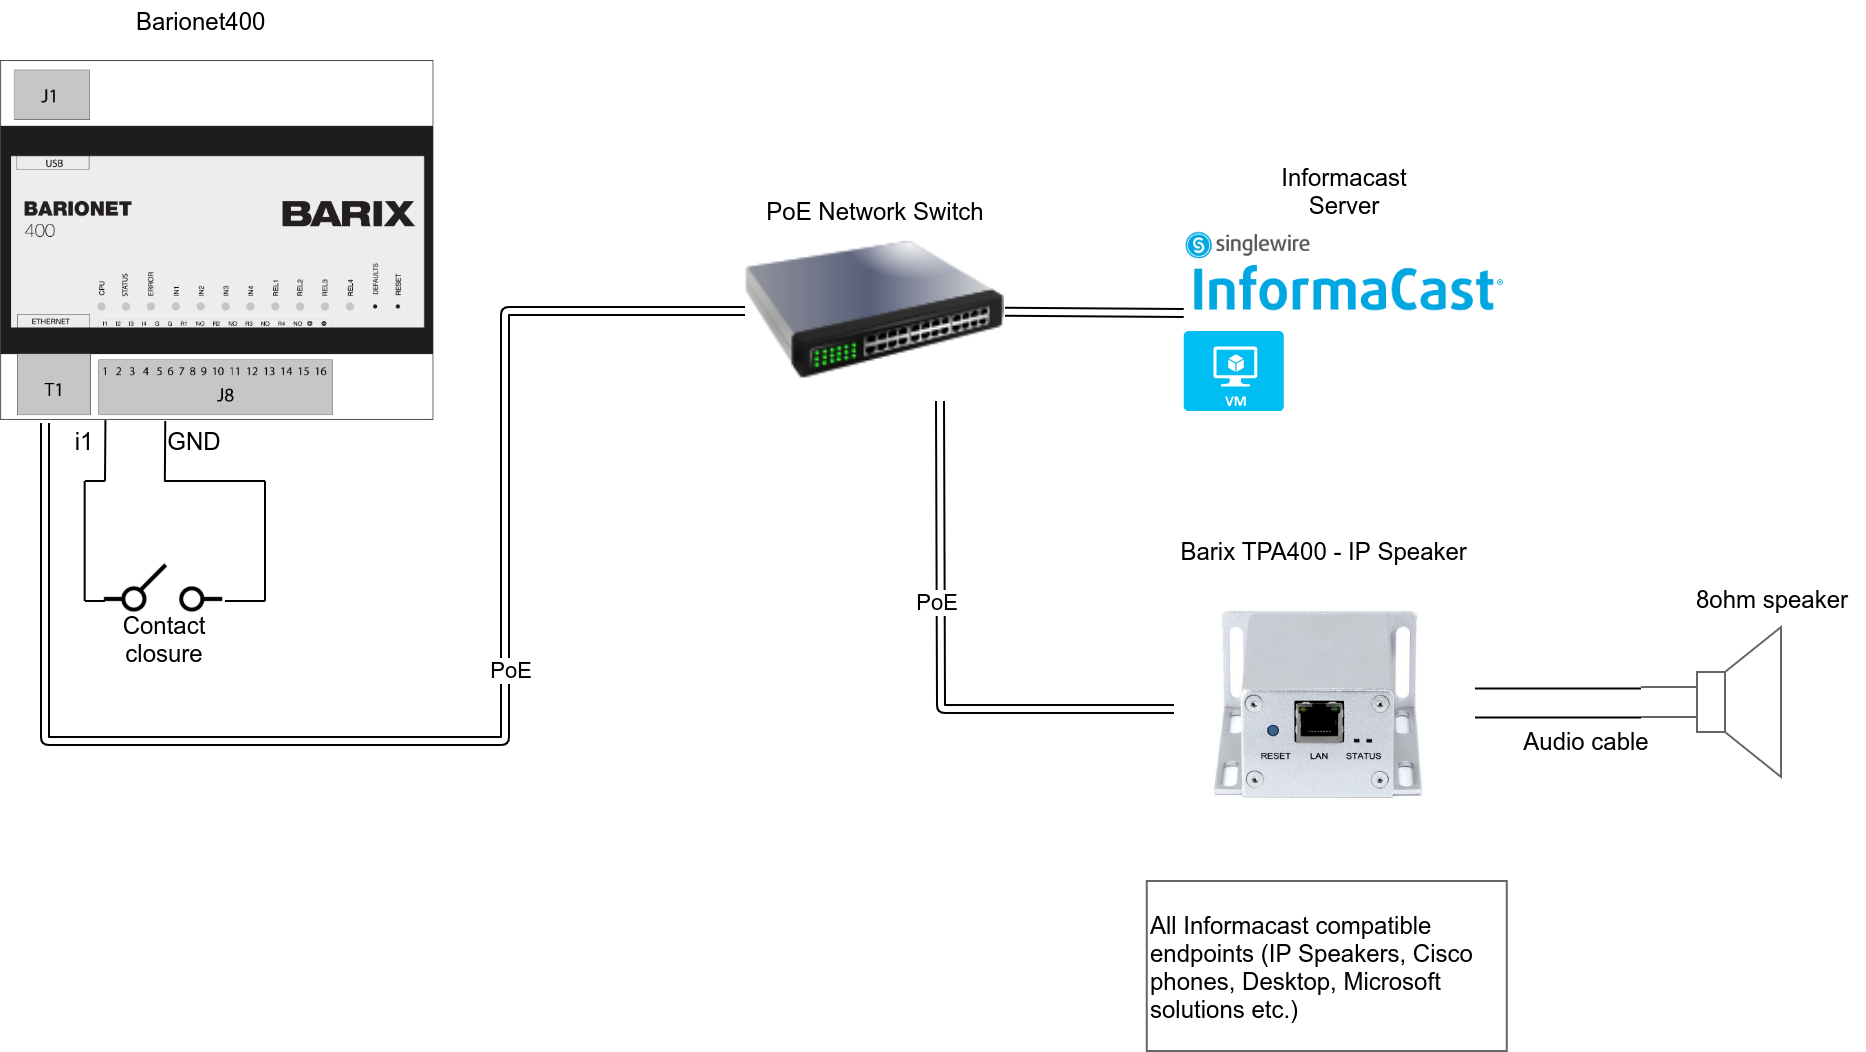
Barionet 400 - PoE programmable controller device (Activator device) running Firmware version 2.16.0 (download at this link)
-
One contact closure device (i.e. a switch or a push button)
-
Network Switch
-
Barix TPA400 IP Former running IP Speaker firmware (the endpoint running as Informacast Client) - TPA400 is PoE powered device.
-
Informacast virtual appliance running on a PC (in this example it is used the latest version of Informacast advanced 12.17.1)
Below is the schematic that shows how the connections are done.
Get started
Setting up Barionet400
-
Find out the IP address of your Barionet400 device either using the Barix Discovery Tool or a network discovery program. By default the Barionet is configured to be a DHCP client, if a DHCP server is in the network it will get an IP address offered from it.

-
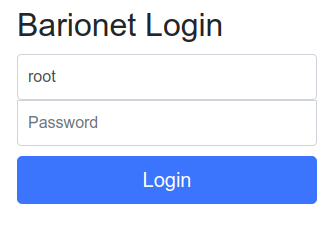
Access the Barionet400 web configuration page with a web browser typing the IP address of the device in the URL field
-
Enter the root user password. Find the password printed on the bottom of the device (labelled as PW)
-
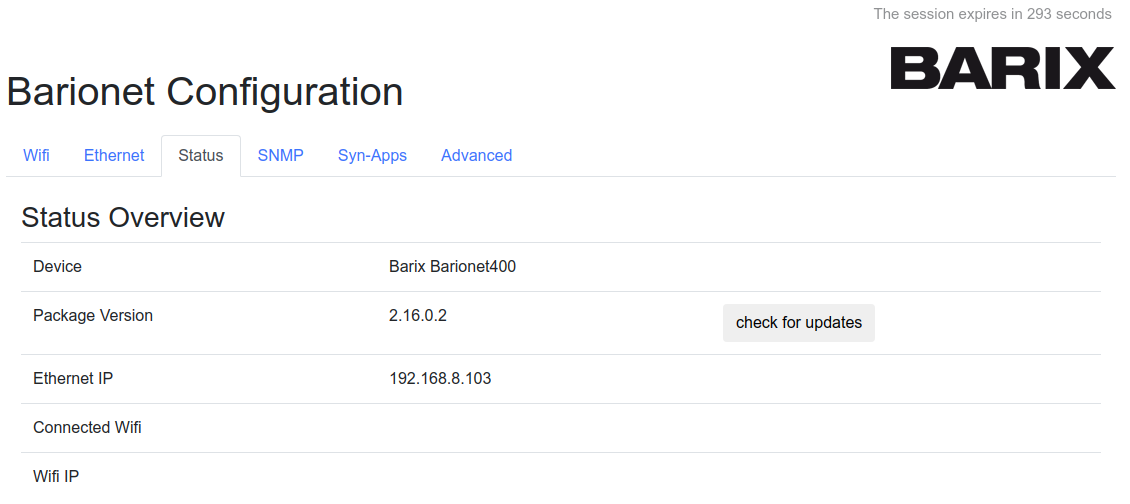
Make sure the device is running at least firmware 2.16.0 - Check in the status page
In case the device is running an older version click on "check for updates" and update the device.
-
Locate the SNMP settings tab
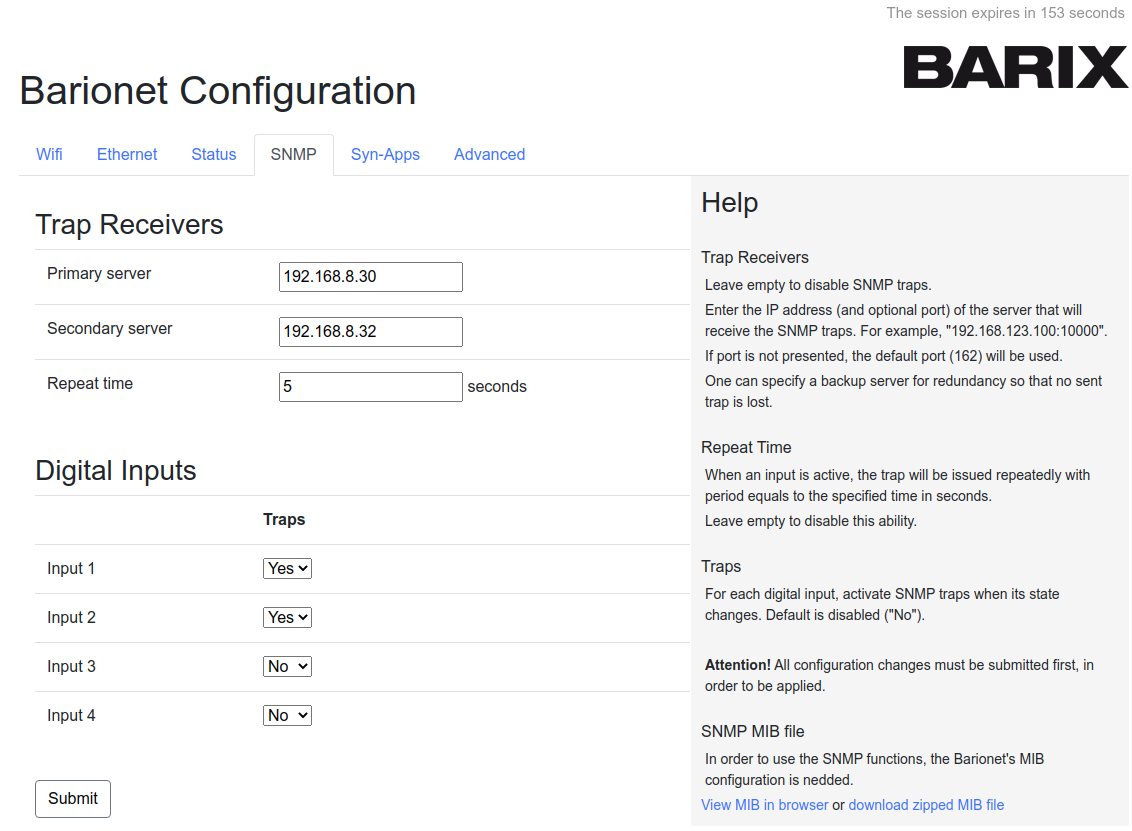
Barionet are working with Informacast using the M2M plugin provided by the Informacast platform. M2M uses SNMP Traps so that Informacast can receive messages sent from specific objects from a Barionet device.
NOTE in the online help section is possible to visualize the MIB definitions used for Barionet devices.
More information are also available on SInglewire's support page where already built OIDs are available (Barionet400 uses same OIDs as Barionet50)
The SNMP tab offers the possibility to set 2 Trap Receivers for redundancy purposes and the possibility to enable traps sent from each one of the digital inputs available on the device.
-
Fill in the primary server address the IP address of your Informacast appliance. The repeat time is used to re-issue the trap at the interval specified in seconds.
-
Enable the traps for the inputs where the contact closure is connected and click on Submit.
Setting up Informacast
Once the appliance is installed and running make sure is reachable from within the network subnet used to access it, it should also be the same subnet used from Barionet.
-
Enter in the URL of your web browser the IP address of the appliance (i.e. https://192.168.8.30:8444/InformaCast/admin this is the complete path used to access Infromacast admin panel). Once in enter your username and password.
-
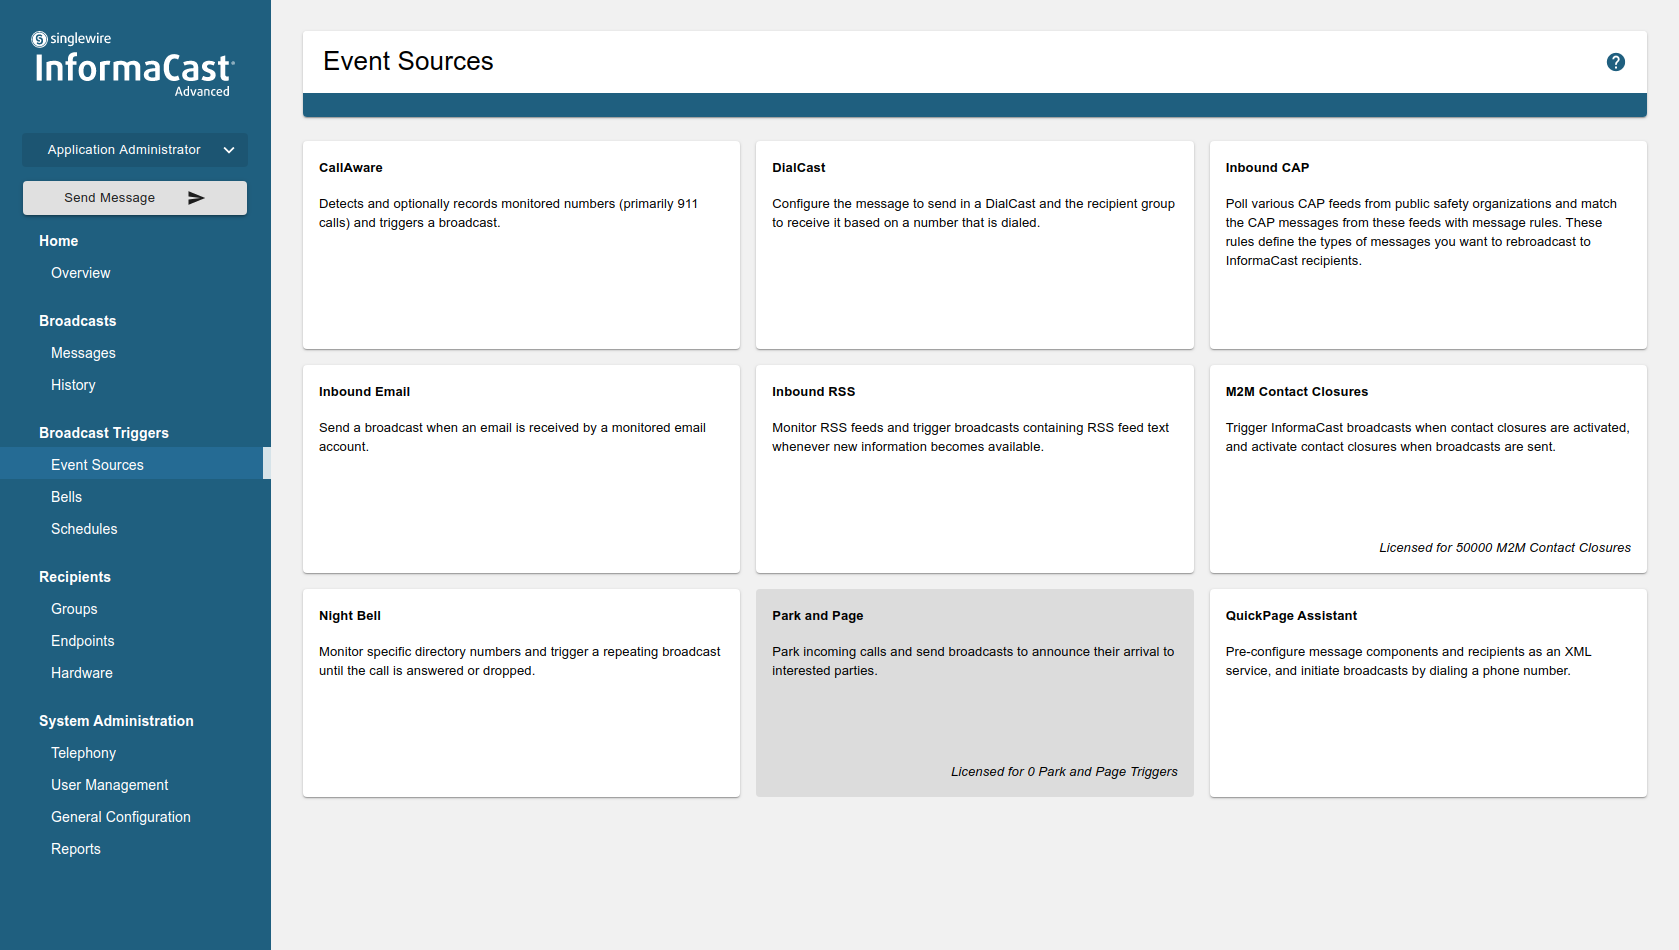
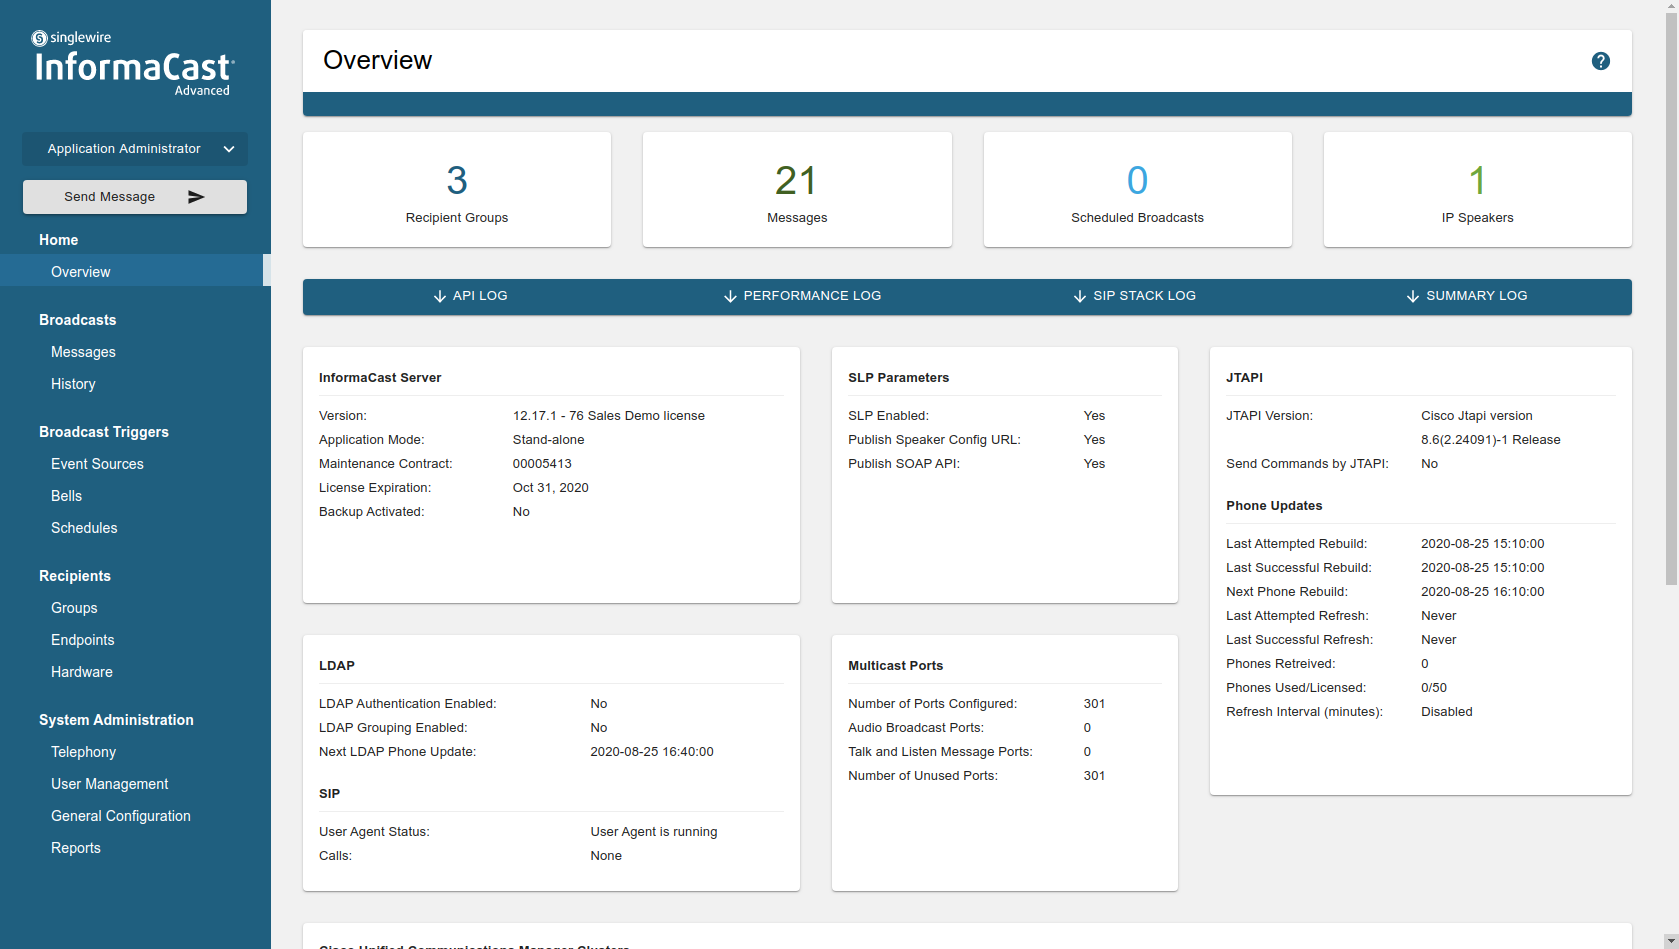
Once logged in the main dashboard is visualized. In order to setup M2M contact closure devices locate Event Sources in the left side navigation menu

-
Then select M2M contact closures frame
-
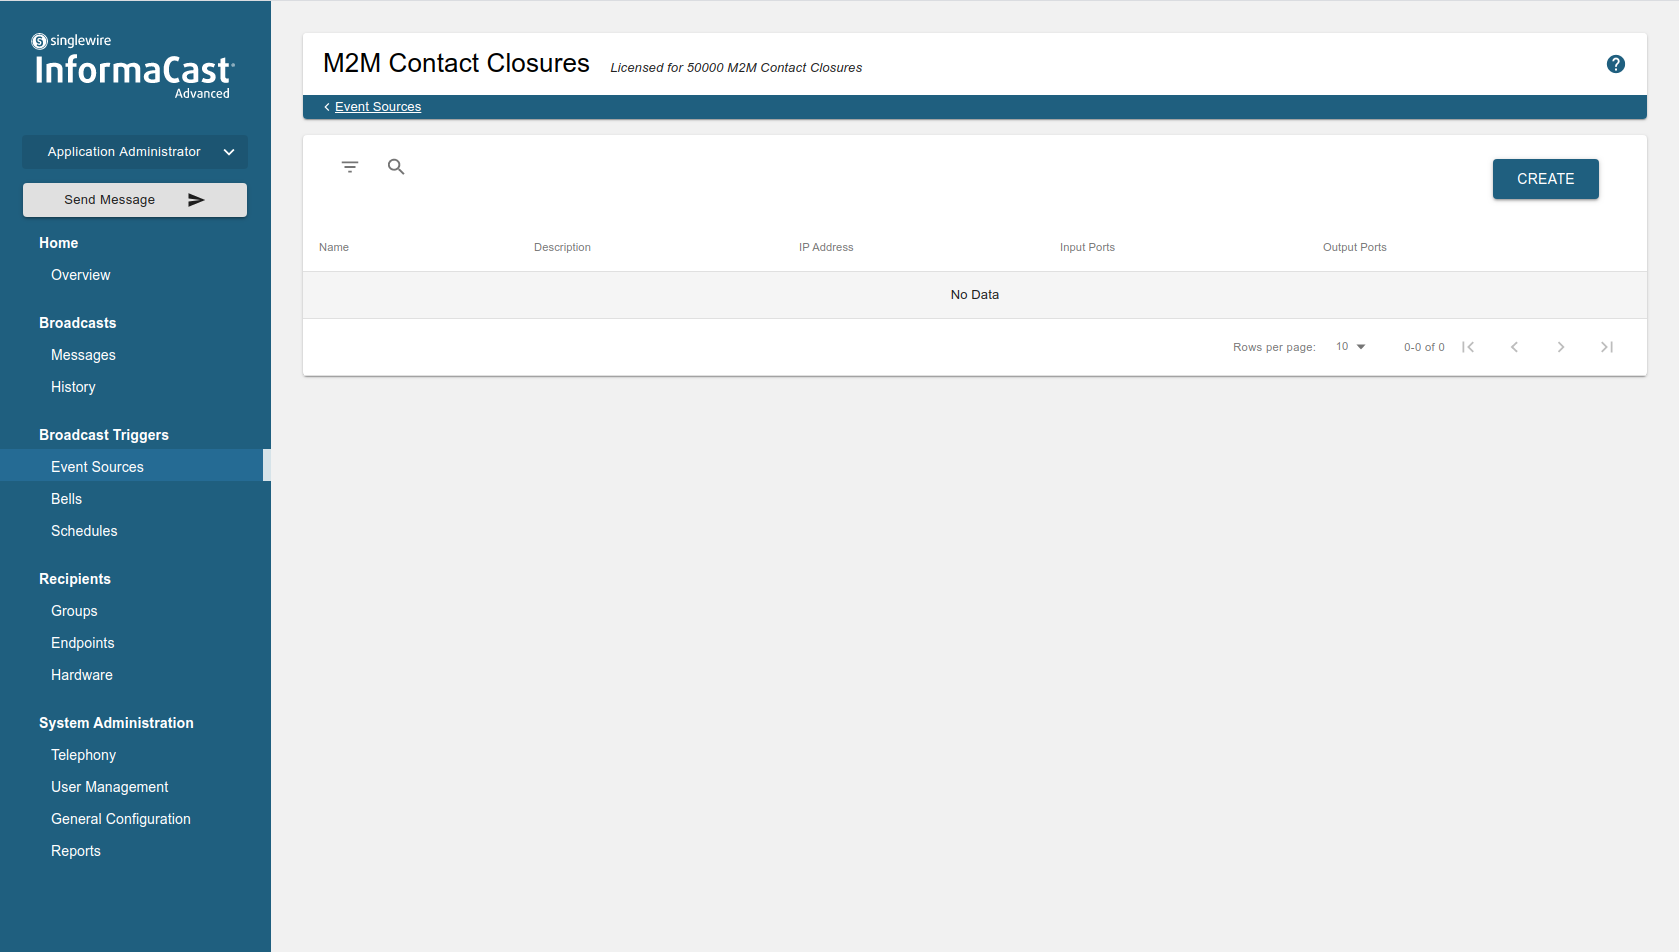
In the M2M contact closures section are listed the devices already created. Click on CREATE to create your first device
-
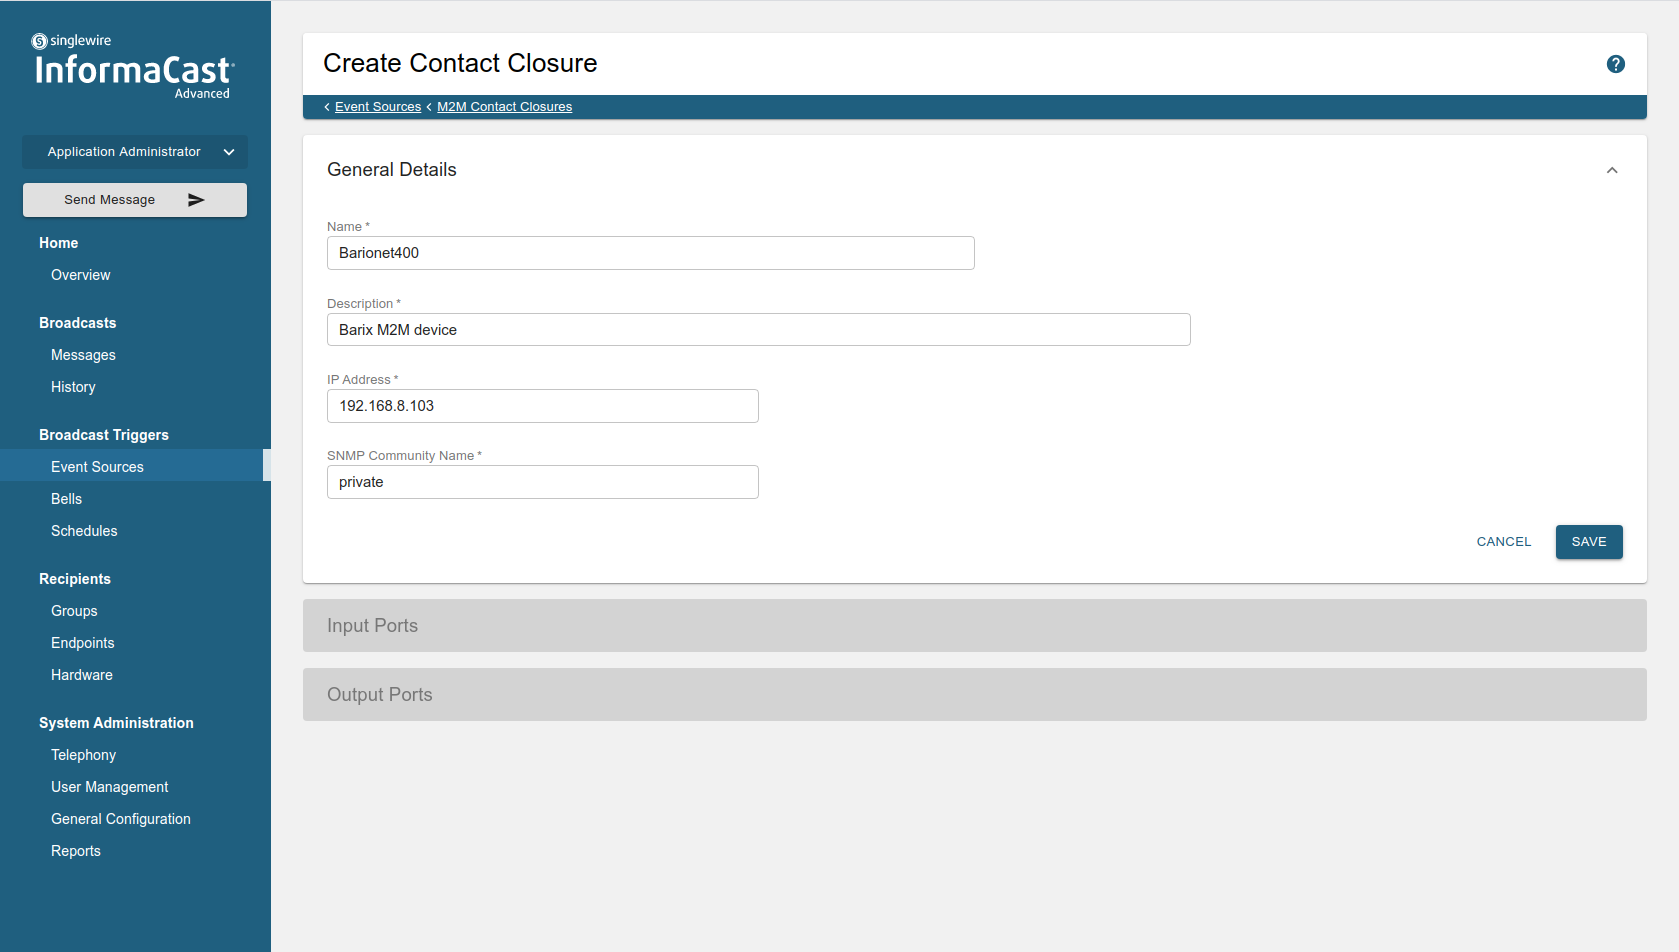
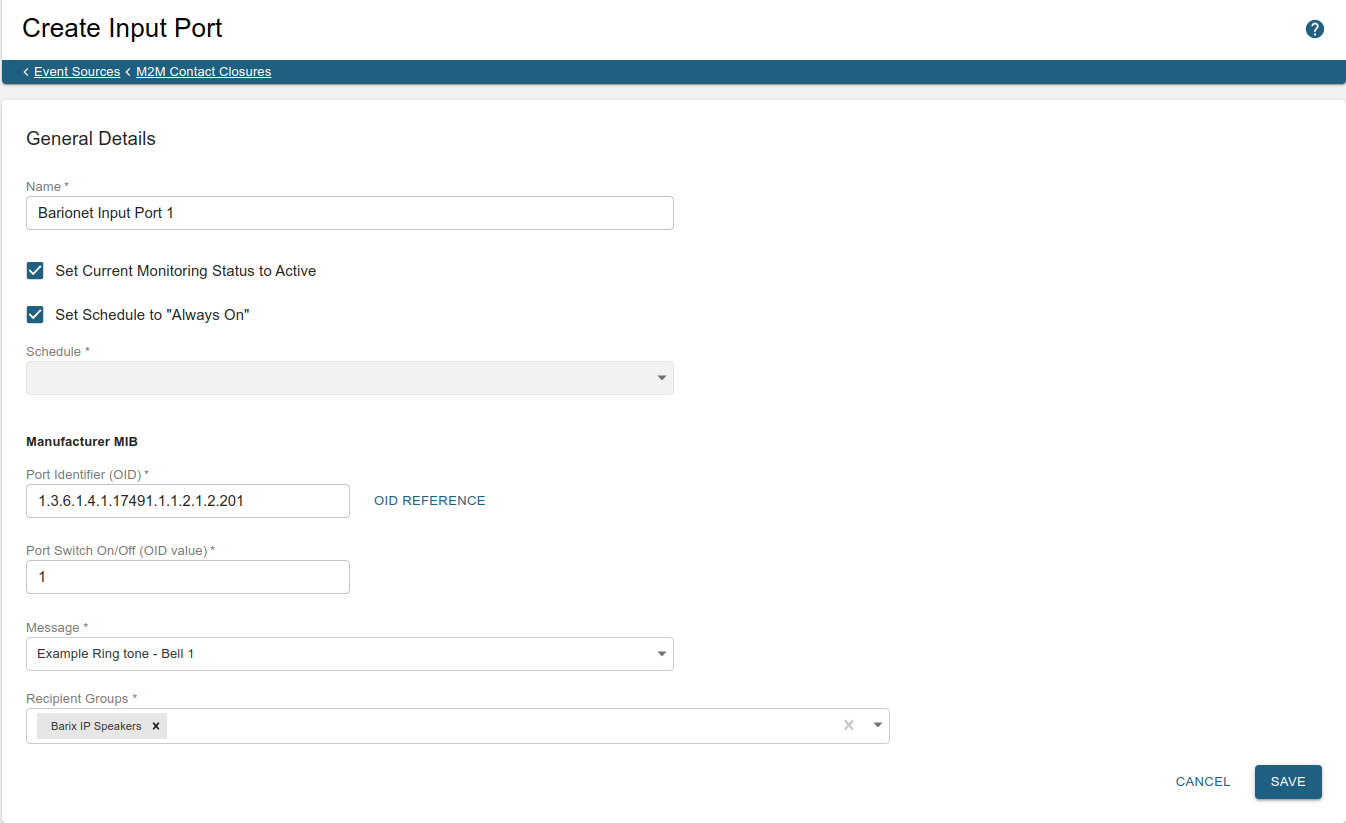
The create contact closure window appears. Fill in the required details:
-
Name
-
Description
-
IP Address of your Barionet device
-
SNMP community name (by default the community name for Barionet400 is "private")
-
Click on SAVE
-
-
After clicking on save the Input and Output ports fields become active so it's possible to add Input / Output ports associated with the device. Click on CREATE in correspondence of Input Ports to add your first port.
-
Name of the port
-
OID for Input port number 1 of Barionet (pre-compiled OIDs are available at the link "OID REFERENCE". Find them also at this link
-
Port Switch on/off: the value associated with the port being activated
-
Message: there are template messages already created within Informacast platform, choose one or create a new one
-
Recipients group: are the group of endpoints configured already. (in the example the group IP Speaker contains the Barix TPA400 device. See in the next chapter how to configure IP Speaker to be discovered by Informacast)
-
-
Once finished clisk on SAVE
-
The first input port has been created.
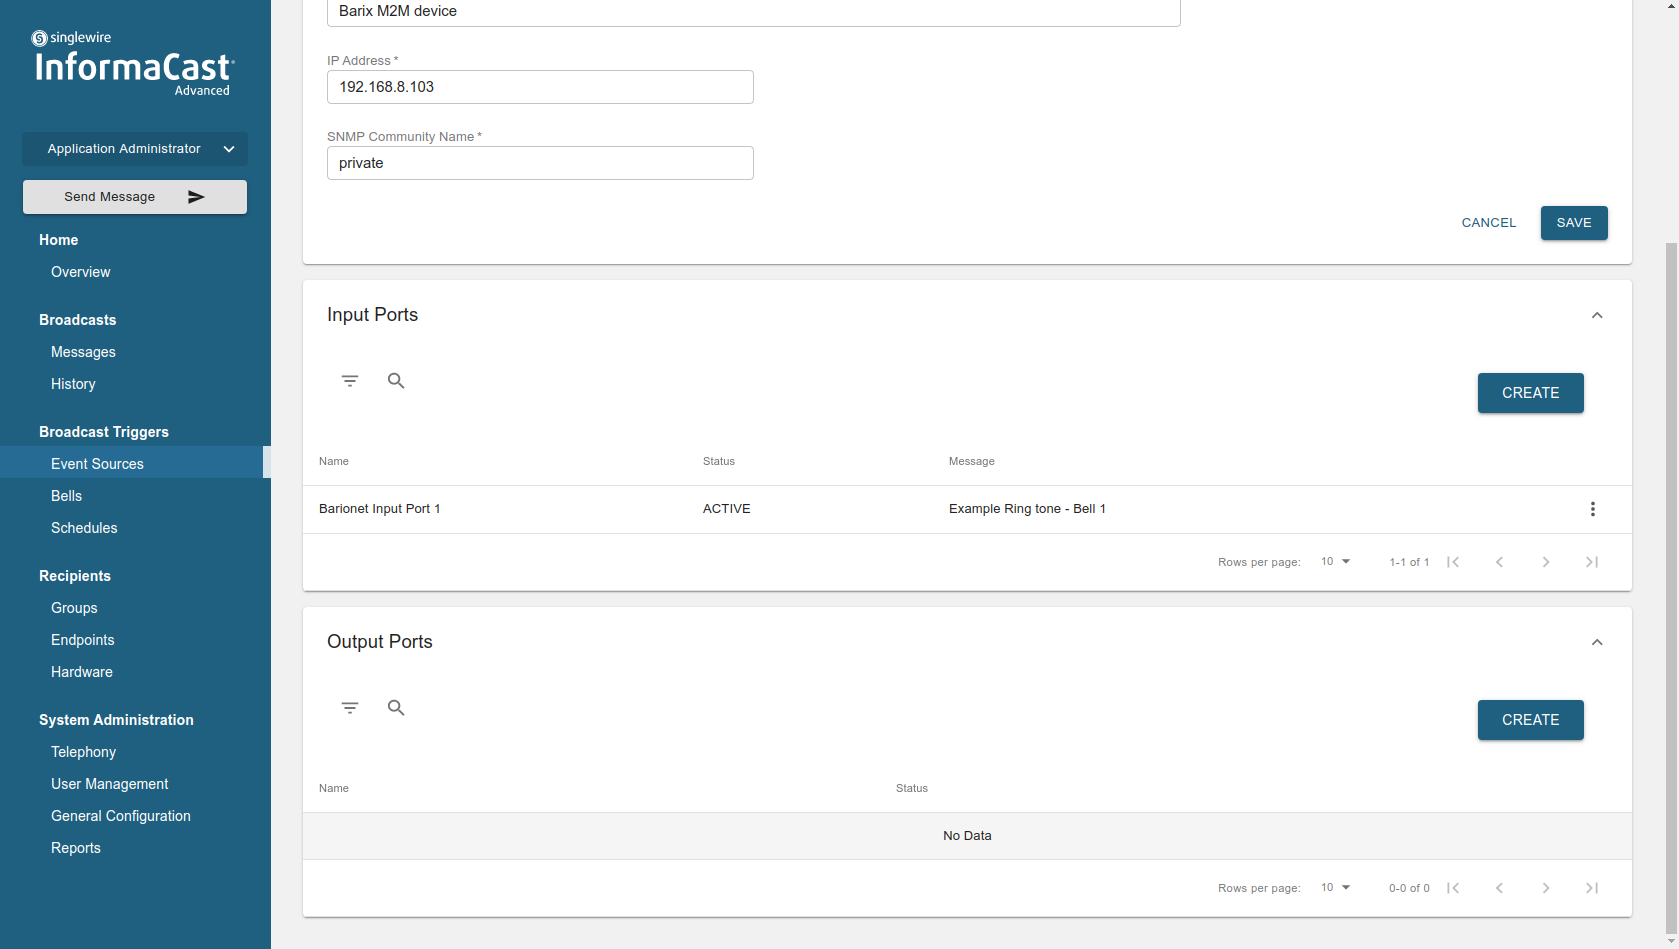
In order to configure more ports simply repeat the steps 6-7. Barionet400 offers 4 digital input that can be configured as Input Ports on Informacast
Setting Up TPA400 - IP Speaker
-
Find the IP address of TPA400 IP Speaker. By default the device is configured to run as DHCP client, if it is able to find a DHCP server in the network it will acquire an IP address at boot and it will announce it to its audio output, be ready to listen to the device announcing the IP address OR use the Barix Discovery tool to identify it
-
By default IP Speaker runs the Informacast client and should automatically register with the Server if it is in the same network subnet. The automatic discovery process uses DHCP OPT150, if this is not available from in the network it is mandatory to provide IP Speaker with the manual address and path to register with an Informacast server
-
Access the web configuration of the device by typing the IP address in the URL field of the browser. Enter the username and password (password printed on the bottom of the device, user = admin)
-
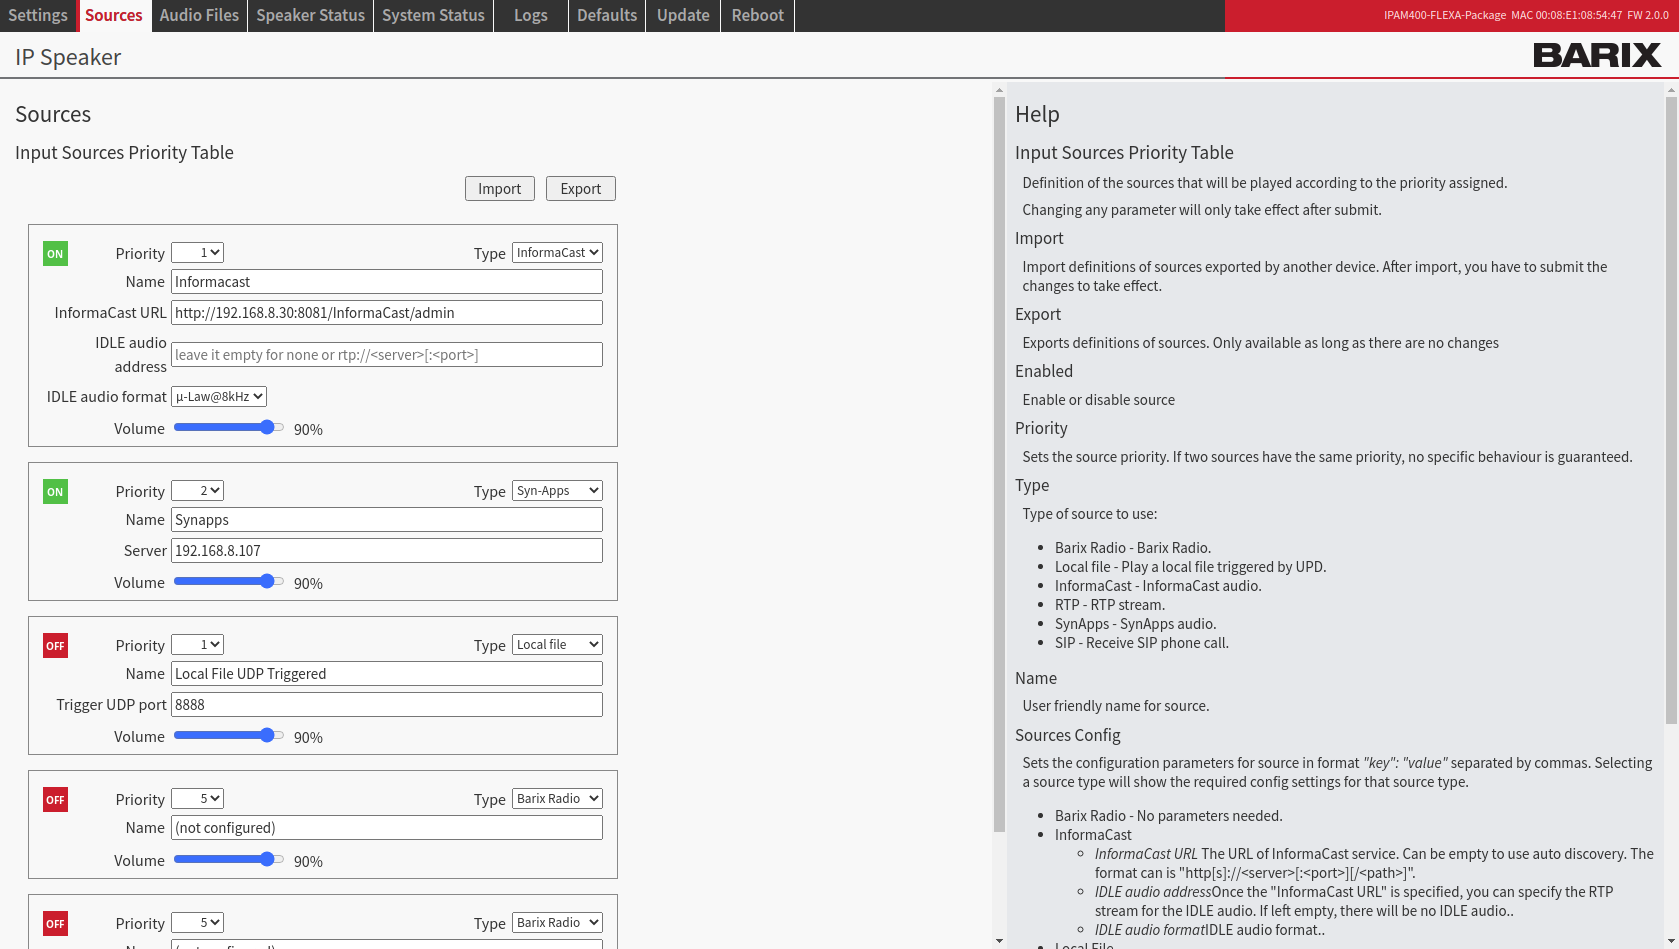
Once in the configuration page, locate the SOURCE tab in the top navigation menu. Here it is possible to visualize that Source A and B are already configured as Informacast and Syn-Apps accordingly and are set to ON.
-
By default the Informacast URL is empty, so the automatic registration process runs, but in case is needed is possible to add the Informacast URL manually. The URL has to be: "http://<IP_ICAST>:8081/Informacast/admin"
-
It is even possible to set an IDLE RTP audio stream to play when no notifications from Informacast are received (Supported protocols: RTP)
-
Once the Informacast address is configured click on SUBMIT at the bottom of the page so the new settings are applied
-
Wait up to 5 minutes and the device should appear as IP Speaker in the Informacast dashboard.
-
It is possible to click on IP Speakers in the top right frame and access the details on the device registered with Informacast. All the device capabilities are automatically retrieved during the registration process.
From this window is even possible to control the device notifications volume and to reboot the device if needed or simply to test if the device is working correctly. To do so simply click on the 3 dots on the right side of the device mac address listed.

-
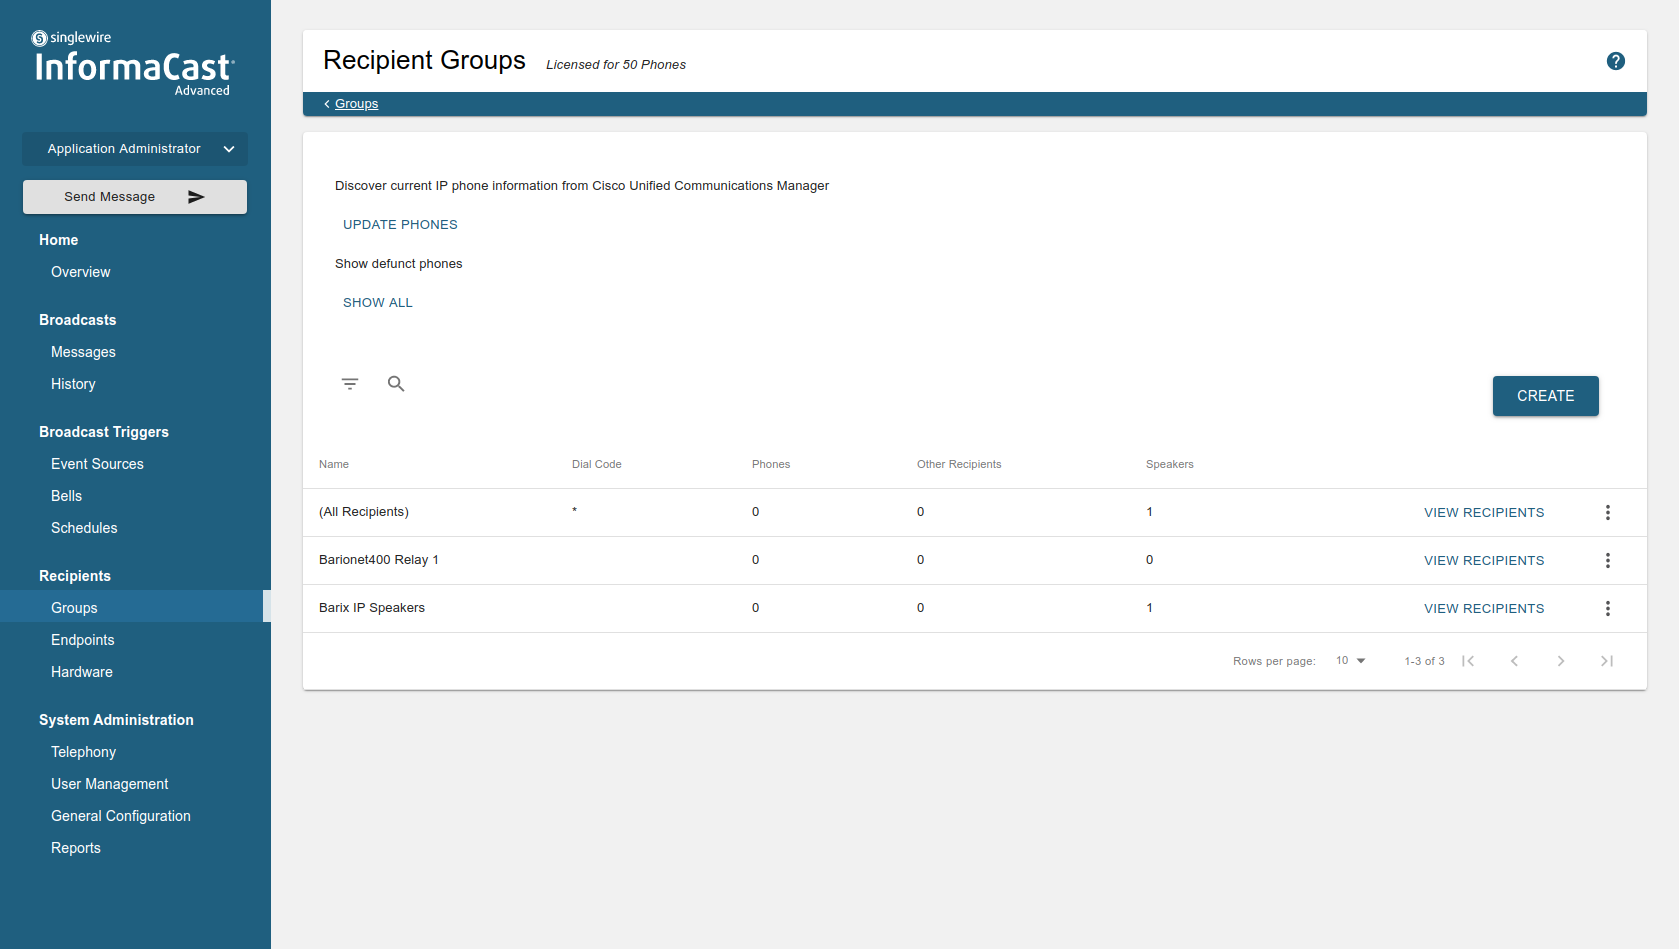
In order to receive notifications is necessary to assign the IP Speaker to a "Recipient Group". Click on Groups under Recipients from the left side navigation menu. click on create and select the devices to assign to the group.
Done! Now you are ready to trigger a notification (Ring Tone Bell from this example) by closing a contact on Barionet400, the notification is then sent to all the members of the recipients group created, in our case IP Speaker running on an IP former device.
For technical assistance send your queries at: support@barix.com or get in contact with your local distributor (https://www.barix.com/buy/)