Control Barionet 400 / 1000 Relays from Informacast
This document is an “how to” describing how it is possible to control Barionet Relays using InformaCast broadcast notifications
Preparation
Barionet 400 or 1000 running at least firmware V2.17
InformaCast server
The integration has been tested and proven to work with InformaCast Advanced 12.17.1 and 12.22.2
The communication protocol that governs the interaction between Barionet and InformaCast is SNMP.
Barionet can send SNMP traps to Informacast to act as a Triggering Source for notifications, thus can be an activation device
OR
Barionet can receive SNMP SET commands from InformaCast when a notification broadcast is sent, this is the focus of this article, despite the procedure to configure traps is very similar.
Configure your Barionet
Connect to your Barionet web configuration interface from a browser and locate the SNMP tab, you must fill at least the “Primary Server” field for the SNMP daemon to run, other fields are also present:
Primary Server: is the ICast server IP
Secondary Server: if you have a redundant system this is the backup server
Repeat (affects only traps): if you want traps to be sent repeatedly by specifying an interval (SNMP Traps are sent by contact closures connected to the digital inputs) - by default is 0, which means no repetition is active
Community name: is the password you need to set on Barionet AND on Informacast to be able to SET the relays from Informacast when sending a notification
Traps: you can activate the traps for individual contact closures. Every time a contact closure is closed it will send automatically a trap to Informacast (traps are not required if the purpose is only to SET relays from InformaCast
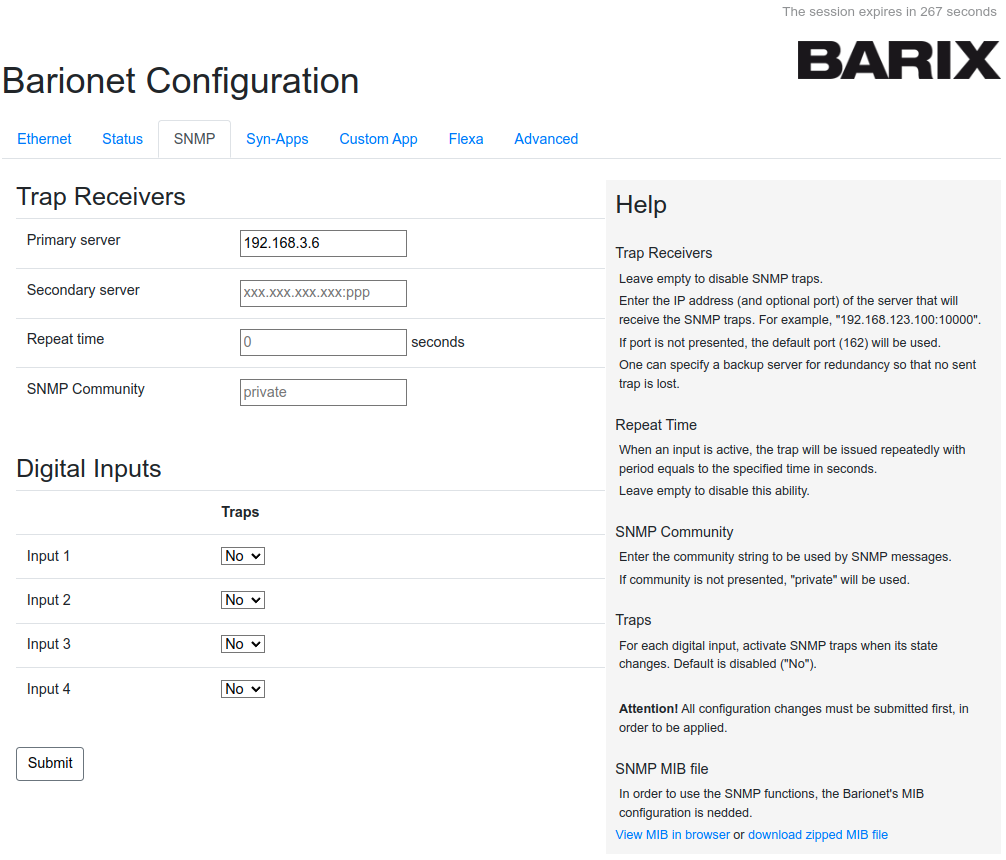
Barionet configuration to enable SNMP
Configure InformaCast
InformaCast “sees” Barionet’s relays as M2M Output Ports, while traps are Input Ports.
The following procedure refers to InformaCast Advanced 12.22.2
Configure an M2M contact closure device under Event Sources -> M2M Contact Closures
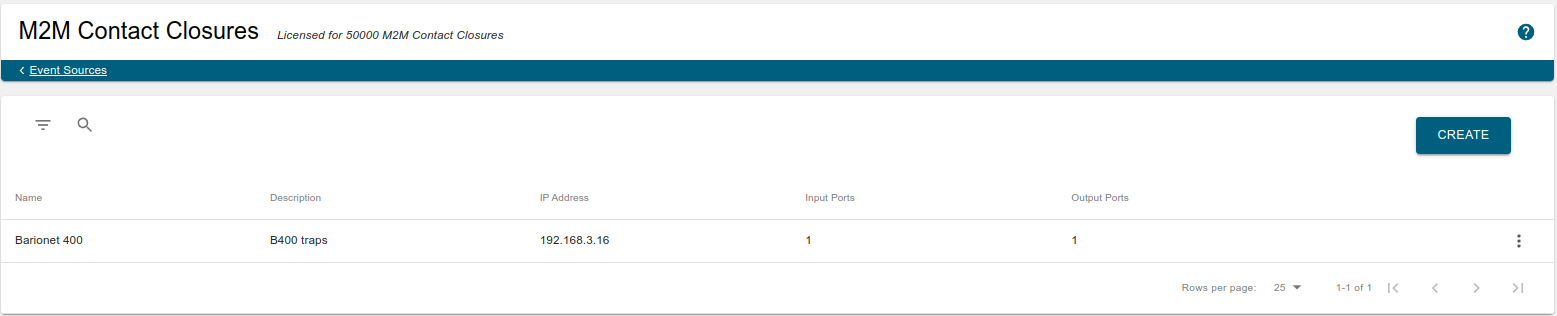
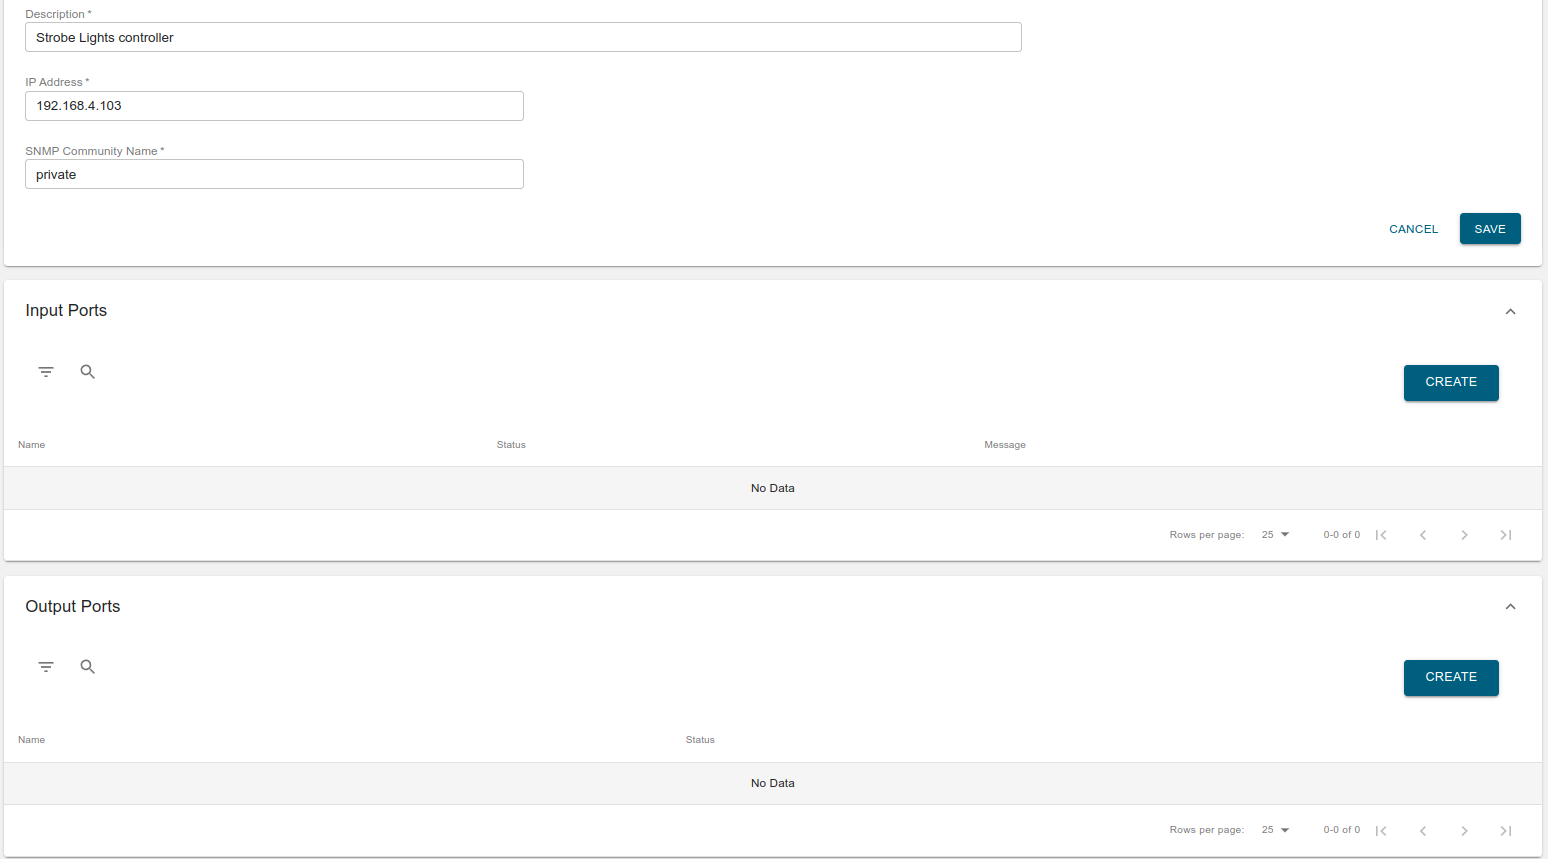
Create a new M2M device and fill in the details (Name, description, IP Address of the Barionet, SNMP Community Name, this last one MUST match what you wrote on the Barionet side)

Click on SAVE. The Input and Output ports become configurable
Add an OUTPUT PORT. Here you can specify which port you want to trigger when sending a notification, by providing the right OID and state change value.
https://support.singlewire.com/s/article/M2M-Plugin-OID-Reference - At this link you can find the OIDs for the 4 relays. IMPORTANT: there is an error on the document related to the OID field type, this has to be INTEGER and not unsigned integer as reported in the doc
NOTE: you will have to create a state for switching the relay ON (value 1) or OFF (value 0)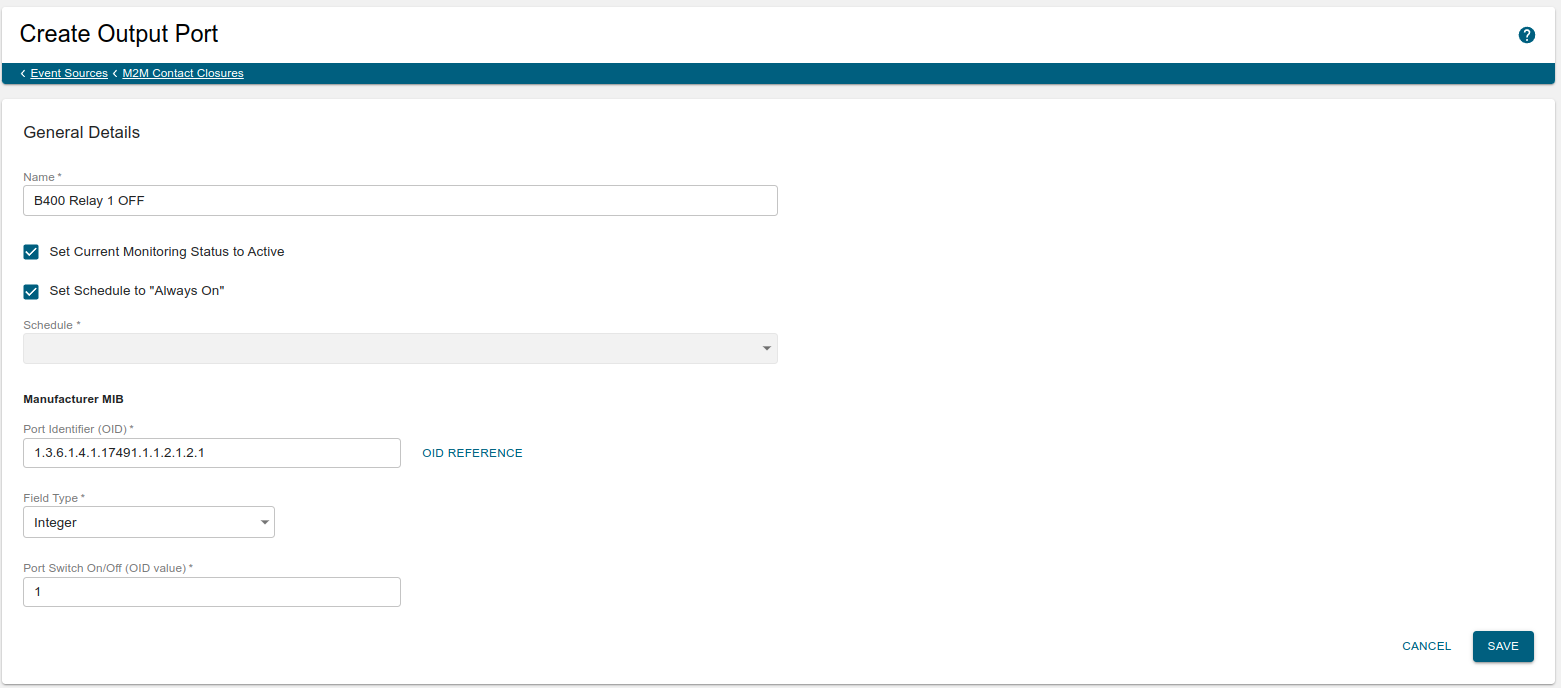
Click SAVE. Add another Output Port to specify another Relay state or to configure another relay of the Barionet
The new Output Port(s) created will be additional endpoints that can be added to a recipient group. on the platform locate Recipient and follow the procedure to create your a with one or more relays according to the number of Output ports configured
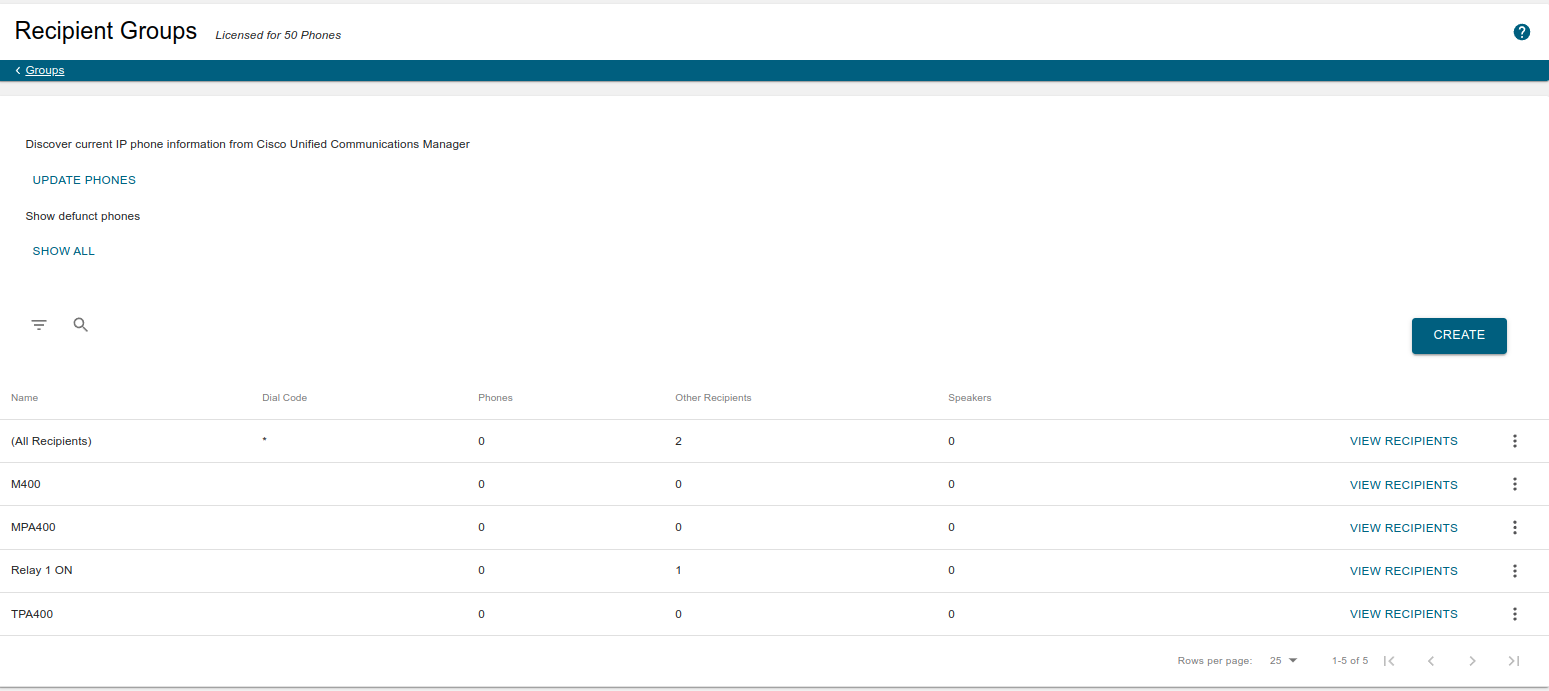
Once done, try to send a notification. SEND MESSAGES -> select as endpoint (recipient group) the group you created and SEND. The relays will activate or deactivate accordingly
Troubleshooting Tips
If the Barionet is not sending or receiving SNMP packets check the following:
Verify M2M Field Type
In case the Output ports are not activating relays, check that the “Field Type” of the output port is set to “INTEGER” on the InformaCast M2M configuration as described in the previous chapter
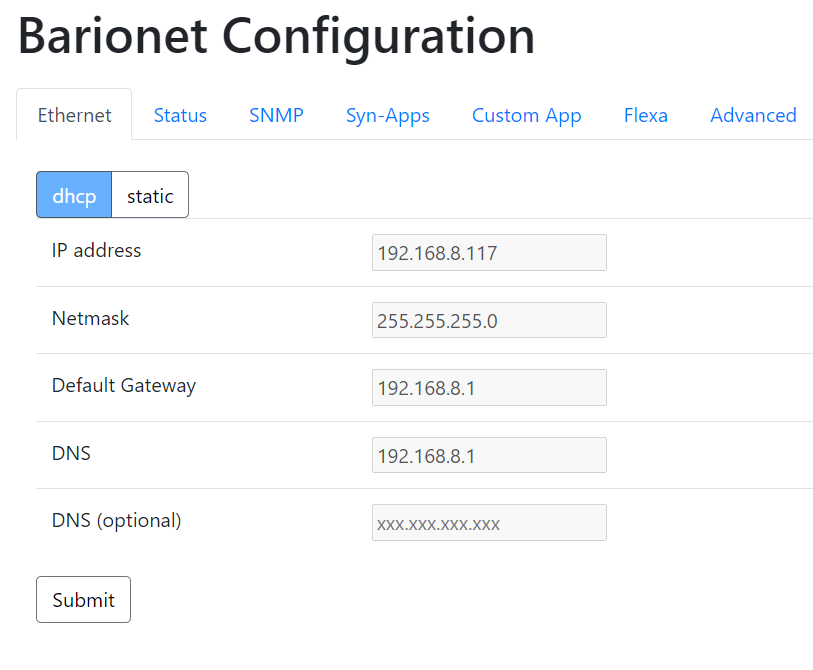
Verify Barionet’s Network Configuration
Check that the network configuration on Barionet is applied correctly, especially in case you are using a static IP configuration: IP Address, Subnet and Gateway properties. If i.e. the subnet or the gateway are not configured correctly the Barionet will not be able to reach the InformaCast server - If you are not sure how to configure these fields check with your network administrator.
An example of network configuration is provided in the image below:
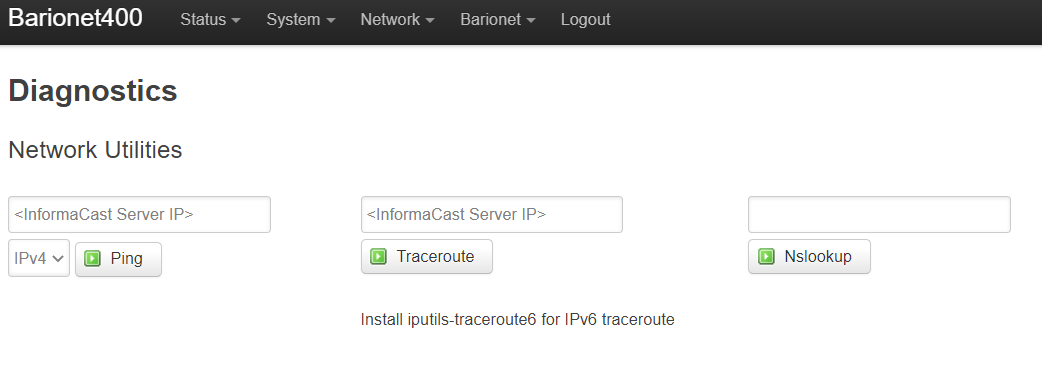
Verify Network Communication with Barionet’s Diagnostic tools
Use the Barionet builtin diagnostics tool to check whether there is connection with the InformaCast server. The Diagnostics tools are provided in 'Advanced → Network → Diagnostics (see image below). Insert your InformaCast Server IP address for Ping and / or Traceroute
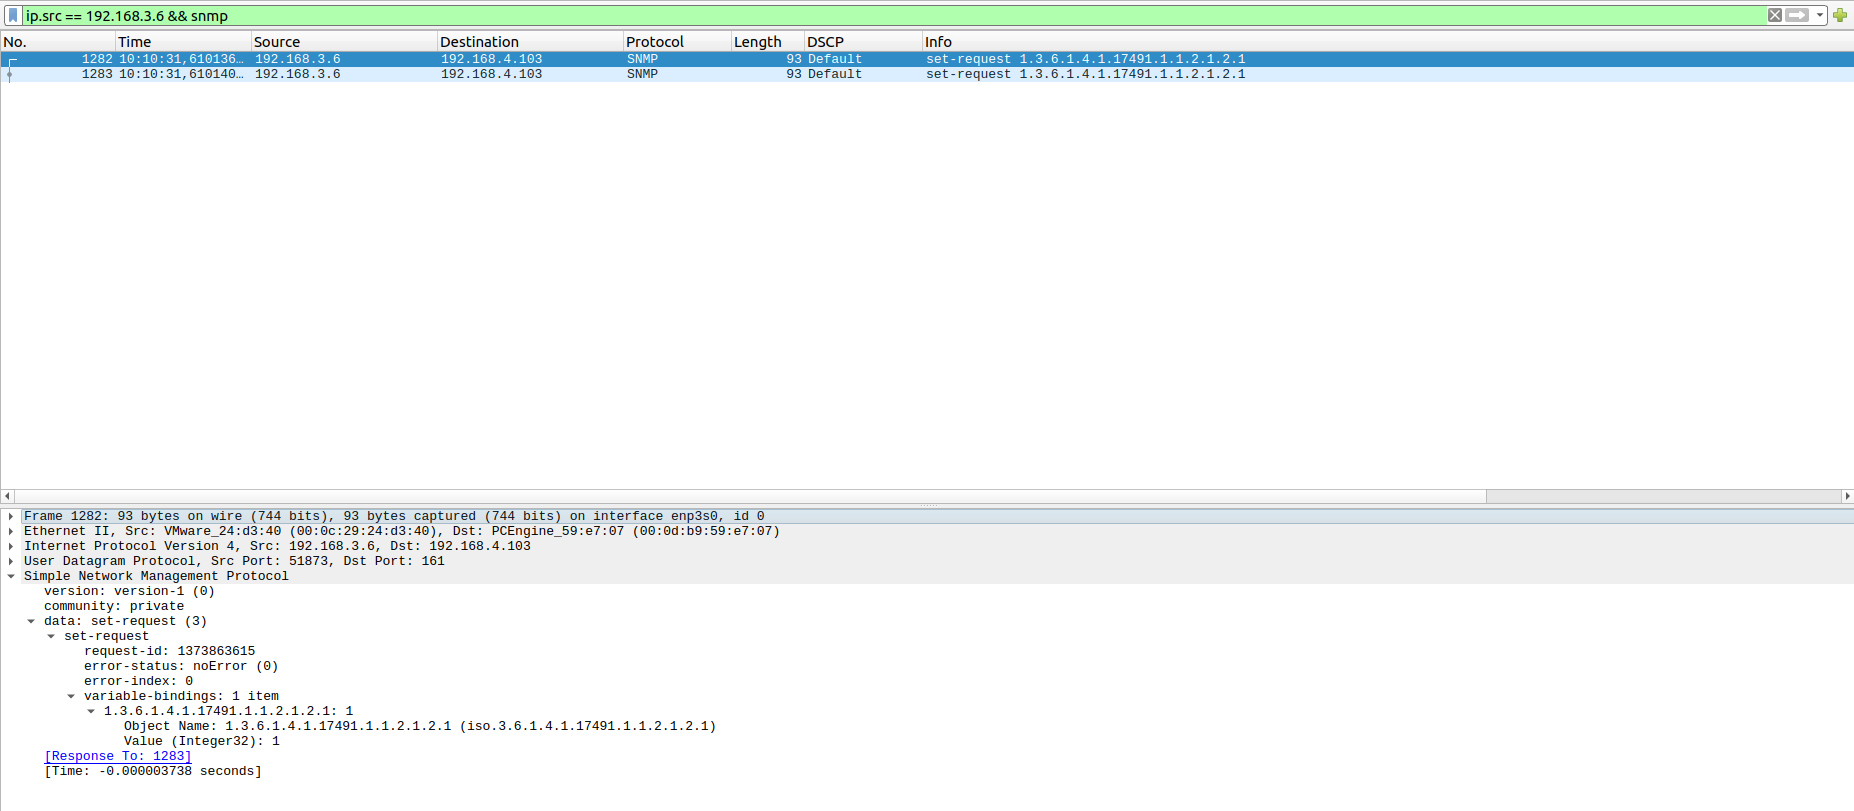
Verify Network Communication with a Network Packet Capture tool
Use a Packet Capture software to check whether there is SNMP traffic between the InformaCast server and the Barionet. (see below example using Wireshark, note the filter used where ip.src is the InformaCast server IP address - NOTE: you may need to enable port mirroring on your switch to be able to see packets exchanged between the 2 hosts)
Verify Network Communication with TCP Dump on Barionet
If Wireshark or similar cannot be used on the network you can also install tcpdump on the Barionet and use that via shell to verify packets arriving and leaving the device.
To install tcpdump on Barionet:
Access via ssh in the device from a command prompt or terminal application (use the same password used to access via web interface)
CODEssh root@<YOUR_BARIONET_IP>Update the repository of the packages available (internet connection is required)
CODEopkg updateInstall tcpdump
CODEopkg install tcpdumpRun tcpdump, in this case filter only snmp traffic
CODEtcpdump -i eth0.2 -v 'port 161'The output will look like this (if the SNMP packets are received otherwise is a sign that packets are not received by Barionet)

Verify Relay operations with SNMP SET
Simulate on Barionet localhost the same commands sent by InformaCast. To do this use snmpset command which is part of the snmp-utils package:
Install and run snmp-util:
Access via ssh in the device from a command prompt or terminal application (use the same password used to access via web interface)
CODEssh root@<YOUR_BARIONET_IP>Update the repository of the packages available (internet connection is required)
CODEopkg updateInstall snmp-util
CODEopkg install snmp-utilsRun snmpset to close relay 1 on Barionet (the command doesn’t return anything, you should see the relay closing the circuit connected to it)
CODEsnmpset -c private -v 1 localhost 1.3.6.1.4.1.17491.1.1.2.1.2.1 i 1Run snmpset to open relay 1 on Barionet (the command doesn’t return anything, you should see the relay opening the circuit connected to it)
CODEsnmpset -c private -v 1 localhost 1.3.6.1.4.1.17491.1.1.2.1.2.1 i 0When the relay enables you must hear a ‘click’ and see the relay 1 led on the Barionet lighting up. Also it is possible to check on the web config in Advanced → Barionet → GPIO the status of the relay
The same commands reported above can be sent from a third party Linux machine on the network (if you have access via ssh to the terminal of InformaCast you can even send those from the InformaCast server without the need to install snmp-utils), just replace
localhostwith theIP_ADDRESSof Barionet.
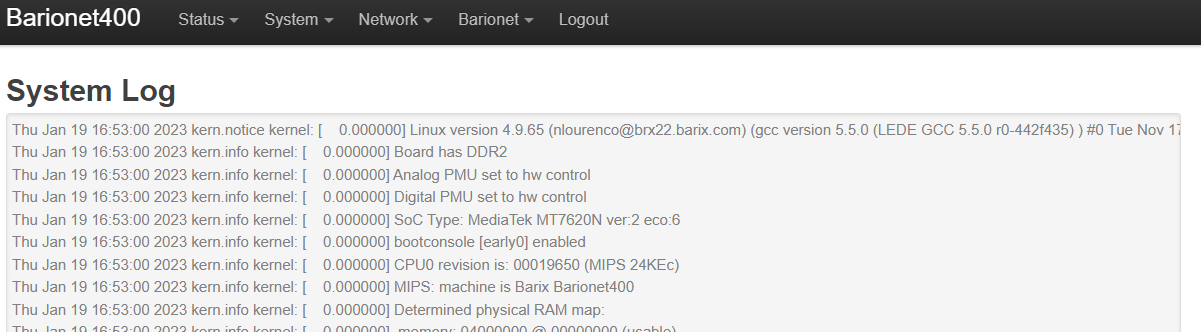
Verify System Logs
Check the system logs to see if any error is reported. Logs can be found in Advanced → Status → System Logs. See image below:
Update Barionet to the latest firmware
Update the firmware of your device to the latest version available. Check the Barionet 400 - Release Documentation to find the download link to the latest released firmware.
NOTE: It may be necessary to perform a clean install of the latest firmware, to do so, make sure to DO NOT FLAG the ‘Keep Settings’ option when updating the firmware from the advanced section (Advanced → System → Backup/Flash Firmware). See image below: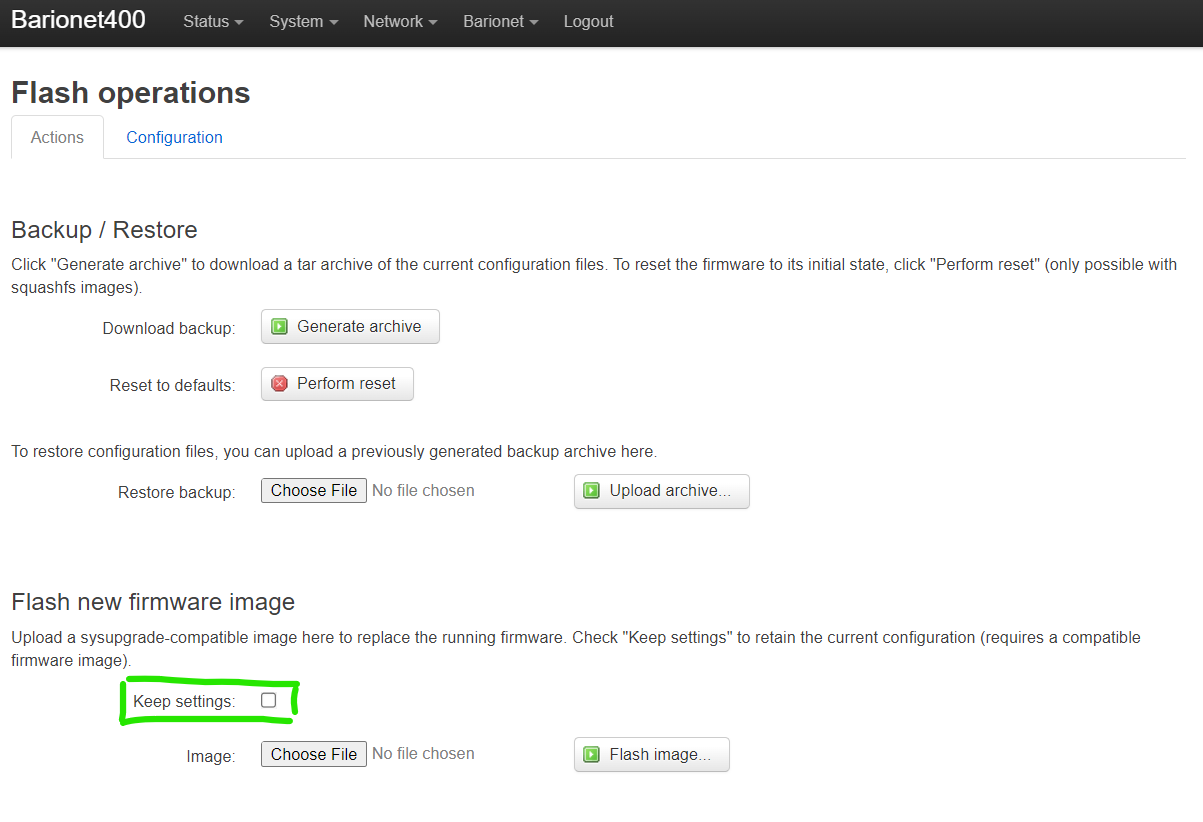
When updating the firmware, be patient and wait up to 10mins. When the firmware is installed the device will reboot on its own. After the unit is back, access again the web config, the login page will appear. At this point make sure to Hard Reload the browser (this is not a normal page refresh), follow this guide which describes the procedure depending on the browser and OS you are using.
Reset to factory defaults Barionet
In some cases it may be necessary to perform a reset to defaults of the Barionet to restore working conditions. To perform a reset to factory defaults:
Power up the Barionet and wait for boot to complete
Press and hold for 12 seconds the DEFAULTS button (do not confuse with the reset button) on the front panel
Wait a couple of minutes, the device will reboot and you can access again its web configuration interface.
NOTE: a reset to factory defaults performed as described above will clear ALL settings, including the network ones and will set the device back to be a DHCP client. You may need to re-apply network configuration settings if needed.