Package content and Prerequisites
-
AudioPoint 3.0 Encoder
-
Power supply
-
RCA / cinch cable
-
Ethernet cable (not included)
-
Headset (not included, recommended)
Safety Precautions
Please make sure to first read the safety information in order to avoid hazards.
Setup the Device
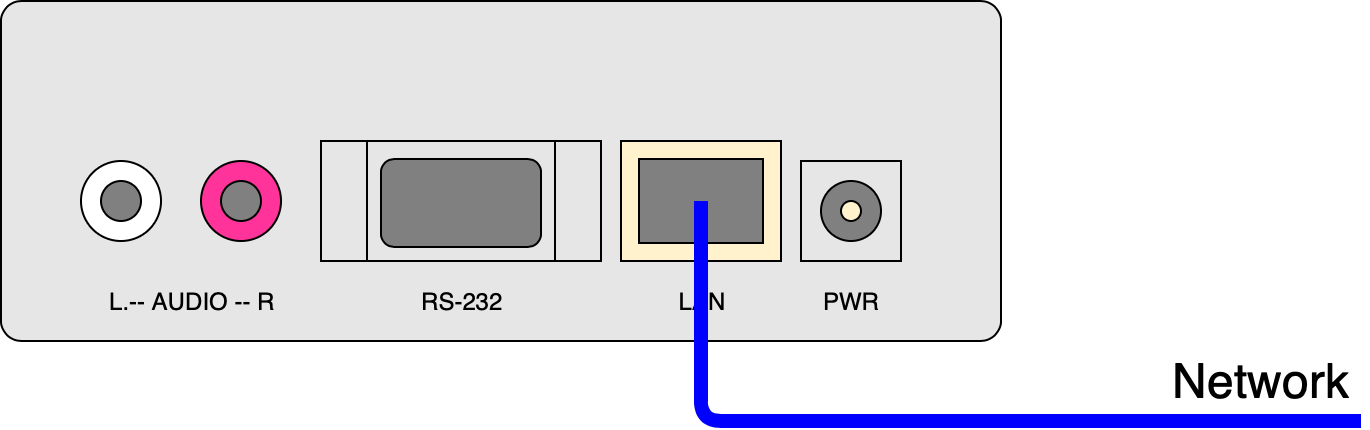
Step 1
Connect the AudioPoint to your network or WiFi-Router using a standard ethernet cable. Be aware that the AudioPoint only works in the same network than the WiFi devices.
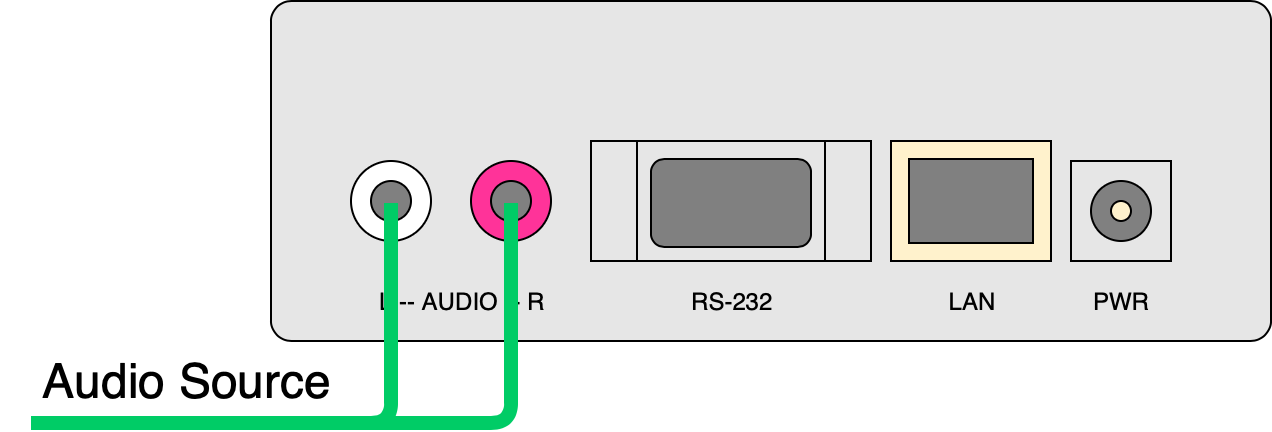
Step 2
Connect your audio sources (up to two per unit) to the RCA interfaces. Since the AudioPoint can only stream mono audio to the listeners mobile phone, both interfaces work independently. They will show up as two seperate channels on the Mobile Phone.
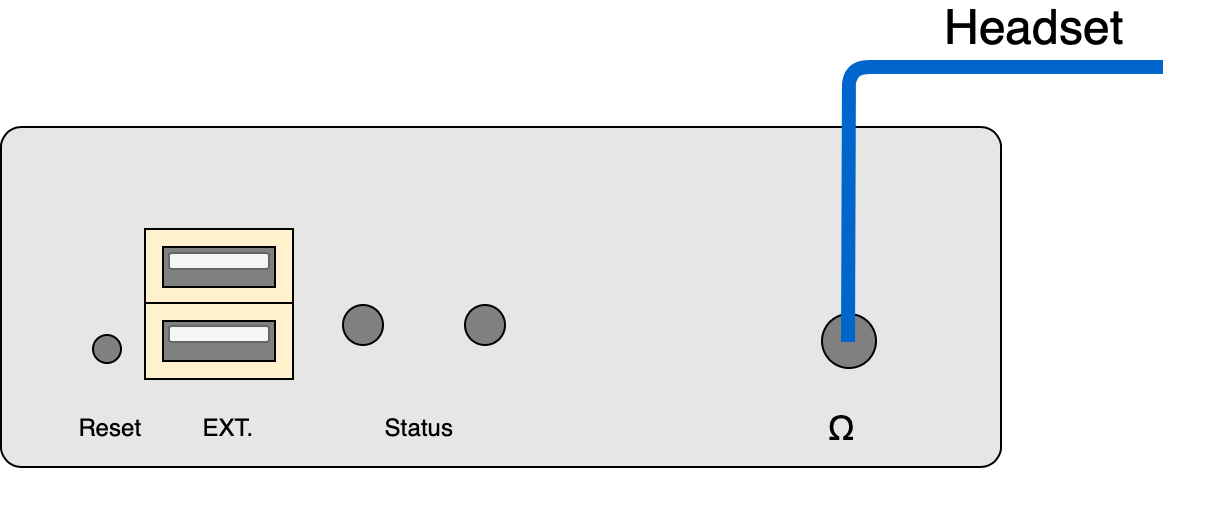
Step 3
Connect a headset to the connector on the front panel to listen to the IP-Address of the device.
Step 4
Connect the power supply to the device and then to an appropriate electrical source. While the device is booting you should hear the IP-Address announced at startup (DHCP by default). You can connect to the device by putting the IP-Address into a Browser as described later at the configuration part.
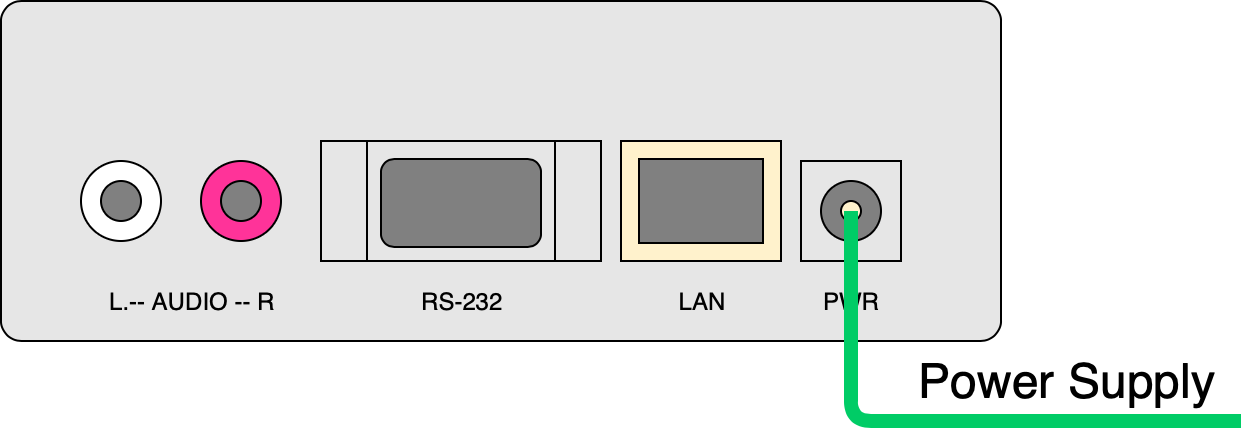
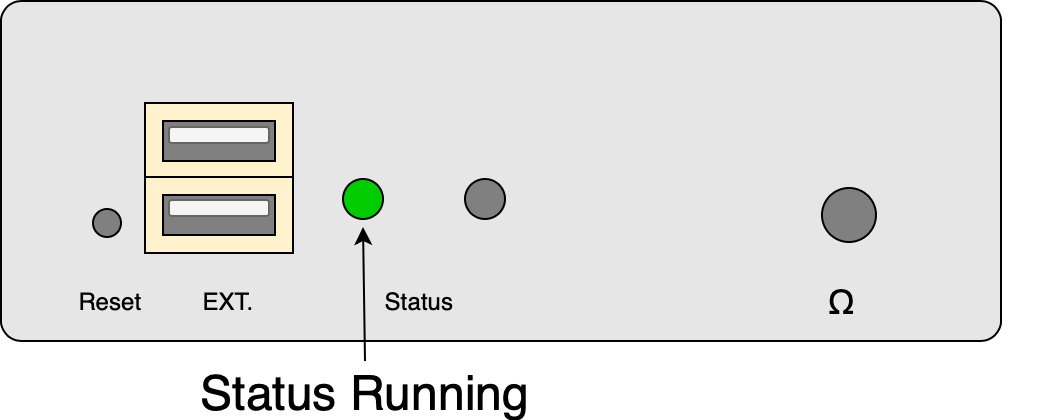
When LED1 becomes solid green, the system is up and running.
Get your Mobile Phone ready
After Powering the device, download the App for receiving the AudioPoint stream.
Barix recently released a new developed App with a new Design named AudioPoint. For compatibility to older devices, the old AudioSignage app is still available (not maintained anymore)!
iOS
AudioPoint App: https://apps.apple.com/ch/app/audiopoint/id1508163144
Audio Signage App: https://apps.apple.com/ch/app/audio-signage/id932316996
Android
AudioPoint App: https://play.google.com/store/apps/details?id=com.barix.audiopoint
Audio Signage App: https://play.google.com/store/apps/details?id=com.barix.audiosignage
After downloading the App on your phone, connect your phone to the WiFi you want to stream through. Start the App and you should see two channels (by default: Local_Left and Local_Right), one for the left and on for the right RCA Input. You should allready be able to listen to the source you connected earlier. If you have multiple AudioPoint Devices installed in the same network, you will see multiple channels and if the channels are named teh same both will show up, they will not merge.
Change the channel settings
Step 1
To connect to the Device, enter the announced IP-Address into any Browser on your PC. Regarding to your Network, you may also need to be in the same network with your PC to access the device. If you did not hear any IP-Address through the Headset, download the Barix Discovery tool from https://www.barix.com/downloads to scan the network for Barix Devices! (works only in the same Network)
You will be prompted for a username and password when trying to access the device, fill the username with admin, the password is printed on the backside of the AudioPoint device. When logged in you can change the password of the WebUI in the security settings of the device.
Step 2
The Barix AudioPoint Device is preconfigured to work on both RCA Connectors out of the Box! To change one of them, enter the CONFIGURATION tab, select your channel and click on Edit Channel. A new window will pop up with all the possible settings, the most important one are..
-
Channel Name => Change the came of the channel displayed when selecting it on the App
-
Local Input => Select on wich RCA Input (left or right) the channel should listen to. You can also have multiple channels listen on the same Input and Source.
-
Channel Logo URL => You can put a URL to an image you want to use as a Logo on a public network path or also from the Internet.
-
Browse logo file => Instead of entering an URL to have a custom logo, you can also upload an image file to the AudioPoint.
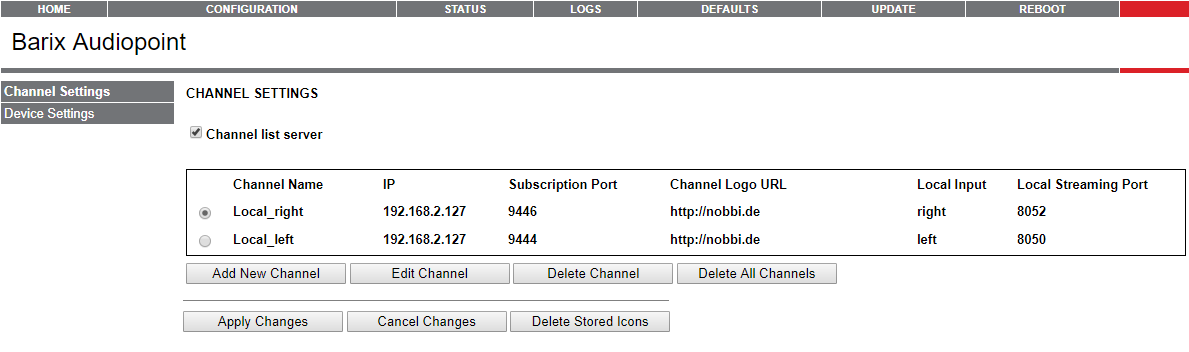
Click on Update Channel, when you are done with your changes. After the Configuration window is closed click on apply for the changes to take effect!
Reset
Through the Web UI
Access the Web UI with the password on the back of the device. Go to the DEFAULTS tab and click on Factory defaults. The device will reboot and the settings are on default.
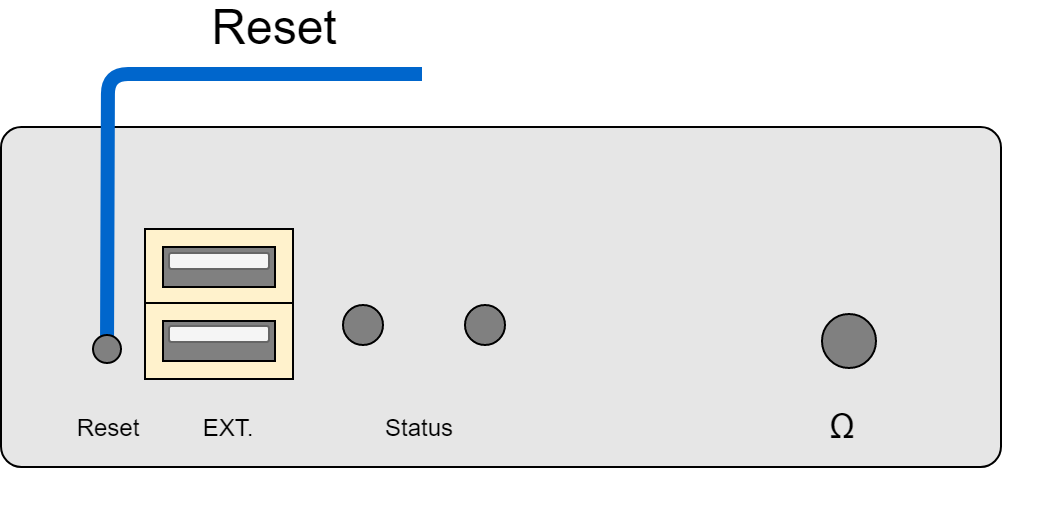
Through the Hardware Button
Push the reset button on the front pannel for at least 10 seconds until LED1 is blinking green. Release the reset button, the device will restart and the settings are on default.
Compliance and further Information
This equipment has been tested and found to comply with the limits for a Class B digital device, pursuant to part 15 of the FCC Rules. These limits are designed to provide reasonable protection against harmful interference in a residential installation. This equipment generates, uses and can radiate radio frequency energy and, if not installed and used in accordance with the instructions, may cause harmful interference to radio communications. However, there is no guarantee that interference will not occur in a particular installation. If this equipment does cause harmful interference to radio or television reception, which can be determined by turning the equipment off and on, the user is encouraged to try to correct the interference by one or more of the following measures:
-
Reorient or relocate the receiving antenna.
-
Increase the separation between the equipment and receiver.
-
Connect the device into an outlet on a circuit different from that to which the receiver is connected.
-
Consult the dealer or an experienced radio/TV technician for help.
Safety and precaution recommendations apply. Find them in the download section at www.barix.com

Find your distributor on this list for more hardware.
For questions that are extending the documentation, feel free to contact us on:
International: +41 434 33 22 22
USA: +1 866 815 0866
Email: support@barix.com
All information and the use of this product including all services are covered under the Barix Terms & Conditions and our Privacy Policy. Please follow the Safety and Precaution Recommendations. Barix is a ISO 9001:2015 certified company. All rights reserved. All information is subject to change without notice. All mentioned trademarks belong to their respective owners and are used for reference only.